Graphics Programs Reference
In-Depth Information
NOTE
Keyboard shortcuts appear in brackets on the Inventor menus.
For a complete listing of keyboard shortcuts, refer to Appendix A.
A tool that I use very often is the View Face tool. View Face is a bit of a misno-
mer because after you've selected the tool, it highlights not only faces but also
edges as you move your cursor over the model. If you select an edge, it rotates
the view of the model so that the edge you selected is centered and horizontal. If
you select a face, it rotates the view so that you're looking directly at the face,
and it centers the face in the view as well. This is a great tool to get yourself
reoriented if you become confused about what you're looking at. You can also
access the tool through the PgUp key.
Previous view has a fl y-out option of Next view if you've already restored a pre-
vious view. Like the Rewind tool, you can use F5 for Previous as well.
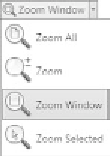
The next tool has multiple options. The default is the Zoom Window tool.
The fi rst icon is Zoom All. No matter what your point of view, clicking this icon
frames your model evenly in the Design window, which is where you're currently
seeing the Shock Absorber assembly.
Click the Zoom icon. You'll notice that the onscreen pointer changes its shape
to two arrows: a small arrow pointing up and a large arrow pointing down. Click
and drag anywhere in the Design window: note that as you drag up, the model
gets smaller; and as you drag down, the model gets larger. If you drag as far as you
can in the Design window but want to continue to zoom, release the mouse but-
ton, move the cursor, and click to start zooming again. To stop the Zoom com-
mand, press your Esc key or right-click the screen and select Done [Esc]. You can
also access the Zoom command by pressing and holding the F3 key. Releasing the
key ends the command. If you're not convinced that it's easy enough to access the
Zoom command, there's one more option. If you have a wheel mouse, try rolling
it. If you roll the mouse away from you, the model gets smaller. If you roll the
wheel toward you, it gets larger.
NOTE
In AutoCAD, you get the exact opposite zooming with a wheel
mouse. This is because AutoCAD's zoom is based on the idea of moving a
camera, and Inventor's is based on moving the object that you're looking at.
If you absolutely need to have Inventor zoom in the AutoCAD fashion, you
can change a setting in the application options, which we'll review later in
this chapter.
Zoom Window allows you to zoom in on a specifi c area by creating a “window”
frame around the area that you want larger. To create the frame, you select the
tool, click where you want one corner, and, while continuing to hold down the
button, drag the size of the frame. When you've encompassed the area you want


Search WWH ::

Custom Search