Graphics Programs Reference
In-Depth Information
The process is quite direct. You link an assembly to the presentation fi le and
use tools to separate the parts and animate their rejoining. Because the process
of setting up the exploded view is so interactive, we'll cover the dialogs when
they come up.
Creating an Exploded View
In this exercise, you'll keep the scope limited to a few components and make
changes to them to see their fl exibility:
1.
Open the New File dialog, and select the
Standard (in).ipn
template.
2.
When the new presentation fi le is created, only one tool is available.
Pick the Create View tool from the Create panel.
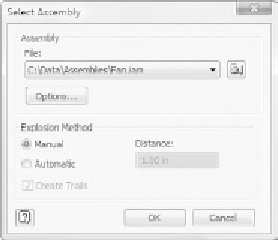
3.
Locate or pick the fan assembly in the File list. Keep Explosion
Method set to Manual.
If you've created an assembly where parts are stacked directly on
one another, the Automatic Explosion Method may work for you.
After you select it, you can set the default distance by which the com-
ponents are separated.
4.
Click OK to place a representation of the assembly into the presenta-
tion fi le.
5.
Save the new fi le to the
Assemblies
folder as
Fan.ipn
.
6.
Change your view to see the Top, Right, and Back faces of the
ViewCube.
7.
Select the Tweak Components tool from the Create panel.
Doing so opens the Tweak Component dialog. This dialog allows
you to select what components are moved (or rotated), in what


Search WWH ::

Custom Search