Graphics Programs Reference
In-Depth Information
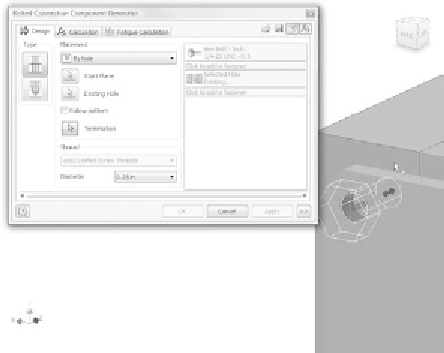
FIGURE 5.26
Selecting the termination plane
9.
In the bolt stack, pick the hole that's being added, and select the ellip-
sis icon that appears.
10.
In the dialog, change the hole type from Normal to Threaded, and
pick the icon with the check mark to make the change.
11.
In the Design window, click and drag the arrow that appears at the end
of the placed bolt, as shown in Figure 5.27. Set it to be
¼ UNC - 0.5
.
This changes the length of the bolt — but it's important to note
that Inventor only changes between standard sizes. This is a great
way to not accidentally create a custom-size fastener.
12.
Expand the dialog, and click the Add button.


Search WWH ::

Custom Search