Graphics Programs Reference
In-Depth Information
19.
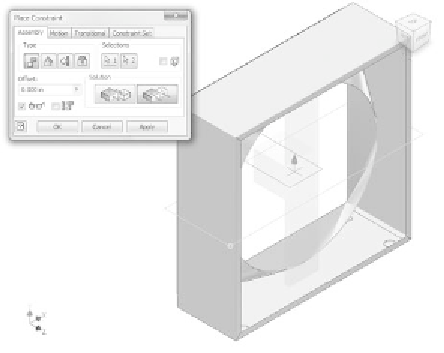
Start the Constrain tool again. Using the Flush solution with an
Offset value of 0, pick the YZ plane of the frame envelope and the XZ
plane of the assembly, as shown in Figure 5.6.
20.
Click OK to fi nish constraining the component in place.
21.
Save the assembly.
FIGURE 5.6
Beginning the new sketch
Restructuring an Assembly
Up to this point, you've built your assembly in a logical fashion. The component
you just created won't be kept in this assembly; instead, it will become part of a
subassembly.
So why did you bother to build it in this assembly? I had you do this to show
that if you initially think you'll be using a part in the assembly, and then you
discover that you want it in a subassembly, you can put it there without having
to redo all your work.
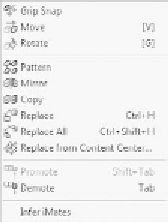
You can do many things to a component in the assembly, as evidenced by the
context menu you get if you right-click a component in the assembly and pick
the Component fl y-out. The option you want to use is Demote.
Demoting a Component in the Assembly
The act of demoting a component in an assembly requires you to add it (and
other components) to a new subassembly. There is also a Promote function that
lifts a part out of a subassembly into the main assembly.


Search WWH ::

Custom Search