Graphics Programs Reference
In-Depth Information
A work axis, like any theoretical axis, can be created by two intersecting faces
or planes, by passing through two points, or by passing through a point normal
to a face. Axes and planes are infi nite, and another great way to build them is to
make them coincident with a sketched line segment; doing so extends that piece
of line beyond its normal boundaries, to add the capability of using parametric
dimension to modify the plane.
You can defi ne a work point at the intersection of an axis and a plane, but it
can also be placed on top of a model point, like a corner or the midpoint of an
edge, or on a point on a sketch.
How you use Work features will vary based on the type of model you make. In
the exercise, the feature you placed from your library wasn't centered on the
part Origin planes and axes. You'll use Work features to produce an axis at the
center of your part.
The fi rst plane will be based on the midpoint of an edge and defi ned to be nor-
mal or perpendicular to that edge:
1.
Locate the Work Features panel on the Model tab, and select the
Plane tool.
2.
Move your cursor across the top edge of the part closest to you when
the component is in the home view. When an icon appears at the mid-
point of the edge, select it to defi ne a point the plane will pass through.
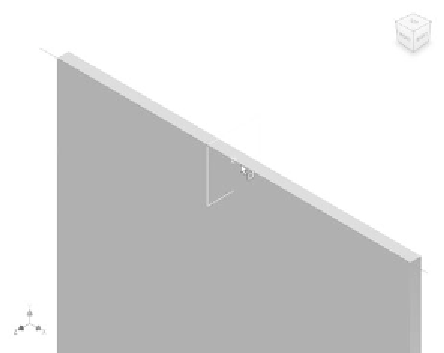
3.
Move your cursor over the same edge, and select it when it highlights
to create the plane. Before you select the edge, a small preview of the
plane's orientation should appear, as shown in Figure 4.7.
FIGURE 4.7
Placing a work plane at the midpoint of an edge


Search WWH ::

Custom Search