Information Technology Reference
In-Depth Information
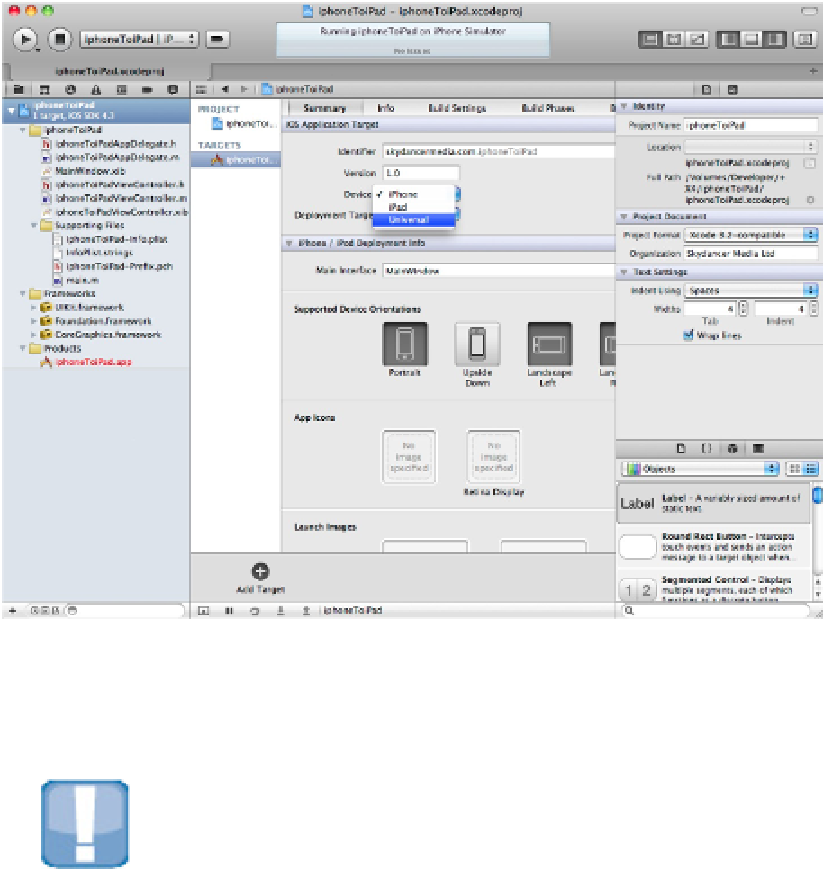
To convert an app, click the project name at the top left of the Project navigator. Select the app under the Tar-
gets icon. Select Universal from the menu, as shown in Figure 8.22. (You can also select iPad, which creates an
iPad-only version.)
Note that this feature isn't prominent. In Xcode 3, you could select a conversion option from the Project menu.
In Xcode 4, you have to know that this feature exists, and where to find it.
FIGURE 8.22
Selecting the new format
Select Yes in the confirmation dialog. Xcode creates a new group called iPad and adds a new file called
MainWindow-iPad.xib to it. This nib is formatted and tagged as an iPad launch nib. You can now run the app
in the iPad Simulator, as shown in Figure 8.23.
CAUTION
There's more to an iPad nib than larger dimensions. Nibs contain device information, so you can't simply resize an
existing iPhone nib by hand. The converter handles the hidden details for you.
FIGURE 8.23
Running the converted app in the iPad Simulator