Hardware Reference
In-Depth Information
InstallinganOpticalDriveand/orHardDrive
DockingStation
At this point, we're nearly finished building the system. All that remains to be done
is installing the optical drive or hard drive docking station—temporarily, in our
case, but perhaps permanently in yours—and completing a few other final tasks.
Until now, we've been working with the case on its side. It's easier to install
drives in the 5.25” drive bays if the case is sitting normally, so stand it up on
your work surface. If you don't intend to leave an optical drive installed perma-
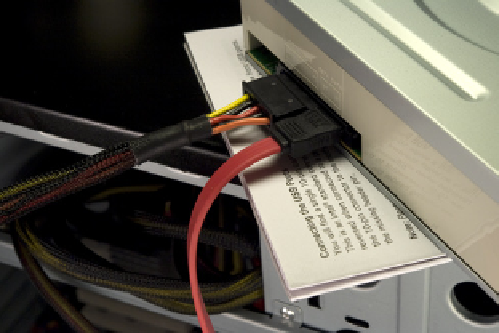
nently, there's no point to installing it in the case. Instead, just set it on top of
the case, as shown in Figure 8-43, and temporarily connect the SATA data and
power cables to it.
Note the Antec Atlas 550 pamphlet between the optical drive and the Atlas
550 case. Although an optical drive is unlikely to short out even with the bot-
tom of the drive in direct contact with the metal chassis frame, after once
shorting out a hard drive we've gotten in the habit of using insulating material
between the drive and the metal case.
If you're installing an optical drive permanently, locate two drive rails and the
parts bag with the mounting screws. Position one drive rail as shown in Figure
8-44. With the drive rail in this position, the optical drive will protrude just far
enough out of the chassis that its bezel is flush with the front case bezel.
Figure 8-43.
An optical drive connected temporarily
Figure 8-44.
Install drive rails on both sides of the optical drive
There are four screw holes in the mounting rail and the drive, but we've never
found it necessary to use more than two screws per drive rail, one at the bot-
tom front and one at the top rear. Locate four drive mounting screws, and test
one to make sure it matches the screw holes in the drive. Once you're sure
you have the correct screws, secure both rails to the drive, using two screws
for each. Connect a SATA data cable to the drive, feed that cable through the
drive bay into the case, and then slide the optical drive into the case, as shown
in Figure 8-45. Use both thumbs to press the drive into position until you hear
the spring-metal tabs latch into place. Working from inside the case, connect a
SATA power cable to the power connector on the rear of the drive.