Hardware Reference
In-Depth Information
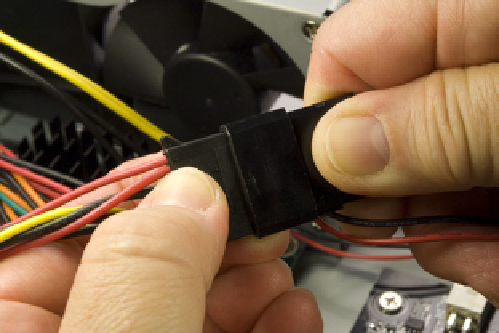
Before you reinstall the drive tray assembly, you need to connect the case fan
power cable and the Slimline SATA power cable. Locate the fan power cable
and a Molex power cable from the power supply circuit board, and connect
them, as shown in Figure 7-33.
After you connect the case fan power cable, set the fan speed switch on the
top rear of the case. By default, it's set to low. We recommend setting fan speed
to high initially for better cooling. Only if you find the fan makes too much
noise on high should you consider setting it to medium or low.
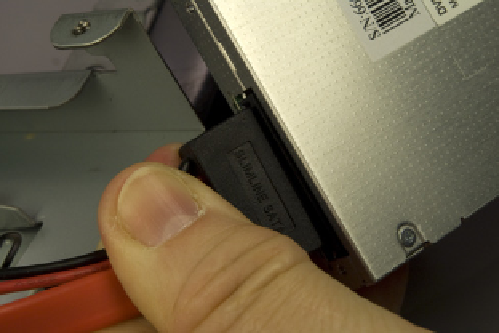
Locate another available Molex connector from the power supply, and con-
nect the power jack from the Slimline SATA adapter to it.
The next step is to connect the Slimline SATA adapter to the optical drive, as
shown in Figure 7-34. If necessary, you can remove the HDD tray temporarily
and replace it after you connect the Slimline SATA adapter (as we did to shoot
this image).
Figure 7-33.
Connect the case fan power cable
Figure 7-34.
Connect the Slimline SATA adapter to the optical
drive
We're about to make things much less accessible, so before you proceed, do a
final check of the interior of the case:
No loose tools or screws (shake the case gently)
I/O shield not fouled
Memory modules fully seated and latched
Main ATX power cable connected and latched
SATA data cables for hard drive and optical drive connected to mother-
board
Front-panel switch and indicator cables connected properly
Front-panel audio and USB cables connected properly
Power connected to case fan and Slimline SATA adapter
Hard drive and optical drive secured to drive assembly tray
Slimline SATA adapter connected to optical drive
All cables dressed and tucked out of the way (insofar as possible)