Hardware Reference
In-Depth Information
Sometimes You Need a Shoehorn
I/O shield grounding tabs, particularly those for Ethernet and
USB jacks, have a nasty tendency to foul the jacks they're
designed to ground. In some cases, the problem is obvious at a
glance, because the grounding tab actually covers the jack. In
other cases, the problem is easy to miss unless you look care-
fully, because the tab intrudes into the jack. Ron Morse notes
that a bright flashlight is helpful to make it easy to see an errant
grounding tab.
Sometimes there's no alternative but to bend the offend-
ing grounding tab out of the way until you've installed the
motherboard. If you have to do that, use the tip of a screwdriver
to bend the grounding tab back into contact with the body of
the jack after you've seated the motherboard and installed the
screws to secure it.
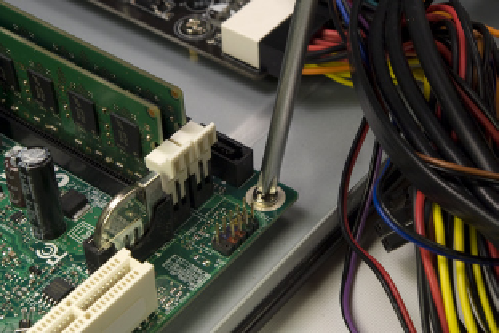
Keep pressure on the motherboard to align the standoffs with the correspond-
ing mounting holes, and drive screws into all four standoffs to secure the
motherboard in place, as shown in Figure 7-15. Tighten the screws finger-tight,
plus at most a quarter turn. Overtorquing the screws may crack the mother-
board or make it difficult to remove later. After you secure the motherboard,
verify once again that the back-panel I/O connectors mate properly with the
I/O shield.
Ron Morse Comments
A tiny dab of soft wax (I use a product
called “Museum Wax,” available at
the grocery store) on the tip of the
screwdriver will hold the screw in
place while you maneuver it into the
mounting hole. Chasing dropped
screws around the inside of a Mini-
ITX chassis is no fun.
Figure 7-15.
Secure the motherboard by driving screws into all four standoffs
Connectingmotherboardcables
The final steps required to install the motherboard are to connect the vari-
ous signal, data, and power cables. It doesn't much matter in what order you
connect these cables, but make sure to get all of them connected. Figure
7-16 shows the positions and pinouts of the connectors on the Intel D510MO
motherboard. Refer to this diagram as you connect the cables.