Hardware Reference
In-Depth Information
InstallingtheCPUcooler
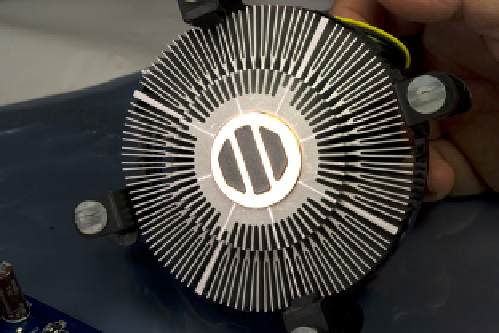
Remove the CPU cooler from its packaging and look at the bottom of the
cooler. The gray patches on the copper bearing surface of the cooler, visible in
Figure 6-14, are thermal compound. This thermal compound melts each time
the processor warms up, filling the voids between the surfaces of the proces-
sor and the base of the heatsink to ensure good heat transfer. If any of those
patches are damaged, carefully rub off any remaining thermal compound, polish
the surface of the heatsink base, and apply an approved thermal paste.
The CPU cooler mounts to the motherboard using four posts that protrude
through matching holes in the motherboard. Because the posts and holes are
in a square pattern, you can install the CPU cooler in any of four orientations.
It doesn't matter which you use, so we generally install the CPU cooler so that
the CPU fan power lead has just enough slack to reach the CPU fan power
header pins on the motherboard.
You can't install the CPU cooler with the motherboard on a hard surface because,
when seated, the posts protrude slightly on the back side of the motherboard.
Placing the motherboard on a soft surface (such as packing foam) allows the
posts to penetrate the motherboard and lock into position. If you use foam,
make sure to keep the antistatic bag the motherboard was packaged in be-
tween the motherboard and the foam. Or, you can do what we usually do,
which is to support the motherboard at a slight angle to provide clearance for
the posts as we press the posts into place.
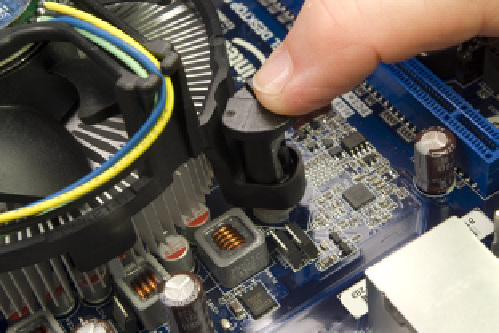
To install the CPU cooler, align the tips of its four posts with the four mounting
holes in the motherboard. Once all four posts are aligned, press down firmly
on one post, as shown in Figure 6-15, until you feel it snap into place.
Figure 6-14.
Verify that the thermal compound on the copper
heatsink base is undamaged
Figure 6-15.
Align each CPU cooler post with a mounting hole and
press down until it snaps into place
After you seat the posts, use a flat-blade screwdriver to turn the top of each
post in the direction of the arrow to lock it into position, as shown in Figure
6-16.