Hardware Reference
In-Depth Information
Figure 6-8.
Press gently to seat the custom I/O shield
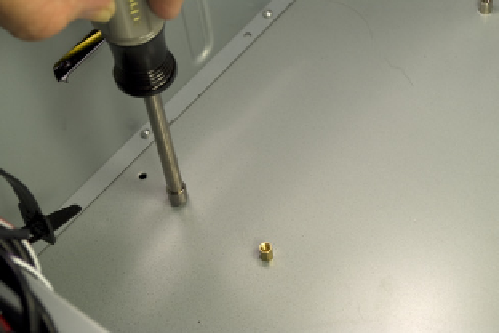
Figure 6-9.
Install a standoff in each position that corresponds to
a motherboard mounting hole
PreparingtheMotherboard
The next step is to prepare the motherboard by installing the processor, CPU
cooler, and memory. Although some case and motherboard manuals suggest
installing these components after the motherboard has been installed in the
case, it's easier and often safer for the motherboard to mount the processor,
cooler, and memory first.
Installingtheprocessor
To begin, locate the processor socket. Ground yourself by touching the chas-
sis, and then release the metal socket lever by pressing it down and away from
the socket body. Once the catch releases, lift the lever until it's fully vertical.
Lifting the lever raises the load plate and exposes the socket. Snap out the
black plastic socket cover and set it aside. Don't discard the socket cover. If
you ever remove the processor from the socket, you should replace the socket
cover to protect the socket until another processor is installed.
Ground yourself to the power supply or chassis frame, and then open the
processor package. Snap off the black plastic processor cover and set it aside.
Once again, store the processor cover in case you ever need to remove the
processor.
The processor and socket are keyed to prevent the processor from being in-
serted backward into the socket. The gold triangle visible in Figure 6-10 on
the left corner of the processor matches a beveled corner on the processor
socket. The processor and socket are also keyed with two notches on the edge
of the processor that mate with two protruding nubs on the inside edge of
the socket. Make sure the processor and socket are aligned properly and then
drop the processor straight into the socket, as shown in Figure 6-10. The pro-
cessor should seat completely without you needing to apply any pressure. If
it doesn't, lift the processor from the socket, recheck the alignment, and try
again.