Hardware Reference
In-Depth Information
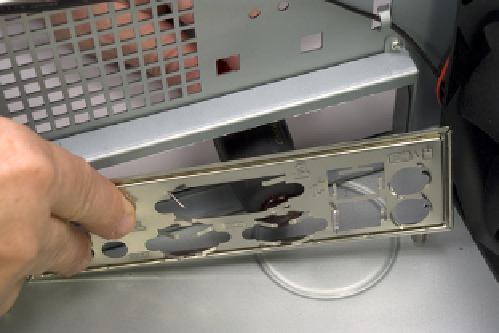
Every motherboard comes with a custom I/O shield that matches the ports on
its rear I/O panel. The included I/O shield is nearly always correct, but we have
on occasion received a motherboard with an incorrect I/O shield. Before
you install the custom I/O shield supplied with the motherboard, compare
it against the motherboard I/O panel, as shown in Figure 6-7. If you received
the wrong I/O shield, contact the motherboard manufacturer to request a
replacement.
Figure 6-6.
Press gently on the generic I/O shield until it snaps out
Figure 6-7.
Compare the custom I/O shield with the I/O panel of
the motherboard
To install the custom I/O shield, first make sure that it's oriented properly rela-
tive to the back-panel motherboard ports. Working from inside the case, align
the I/O shield with the cutout. Using a screwdriver handle, start at one corner,
as shown in Figure 6-8, and press gently until the I/O shield snaps into place.
Run the screwdriver handle around the edges and corners of the I/O shield to
ensure that it's fully seated.
After seating the I/O shield, hold the motherboard aligned in position directly
over the case. Compare the positions of the motherboard mounting holes
with the standoff mounting positions in the case. The Intel DH55TC has eight
mounting holes. The Antec NSK-2480 case has six standoffs preinstalled, all of
which correspond to mounting hole positions in the motherboard. Locate and
note the two positions that require standoffs to be installed.
Better Safe Than Sorry
Make absolutely sure that every
standoff installed corresponds to
a motherboard mounting hole. An
extra standoff can contact the bot-
tom of the motherboard, causing it
to short and possibly damaging or
destroying the motherboard and
other components.
Install a brass standoff in each required position, and then use the mother-
board again to verify that a standoff is installed at each of the required eight
positions. Although you can screw in the standoffs using just your fingers, it's
much easier and faster to use a 5 mm nut driver, as shown in Figure 6-9. Be
careful not to overtorque the standoffs as you install them. The standoffs are
made of soft brass, and the motherboard tray, although steel, is relatively thin.
Applying too much torque can strip the standoff or the screw hole. Finger-
tight is good enough, plus maybe an extra quarter turn or so.