Hardware Reference
In-Depth Information
Connectingpowertothemotherboard
The next step is to connect the main and supplemental power cables to the
motherboard. To begin, locate the 24-pin main ATX power cable in the bun-
dle coming out of the power supply. Route it out the right side of the chassis
and then pass it back into the motherboard chamber via the cutout nearest
the main ATX power connector on the front edge of the motherboard. The
cable connector is keyed to the motherboard jack by a combination of square
and rounded holes for each of the 24 pins. Orient the connector with the keys
aligned and press the cable connector down firmly until it seats in the mother-
board jack, as shown in Figure 5-44. Verify that the latch on the cable connector
snaps into place over the tab on the side of the motherboard jack.
Most motherboards use the four-pin ATX12V connector to provide supplemen-
tal 12VDC current to the processor socket. Some motherboards that accept
high-current processors, including the DX58SO, substitute the eight-pin EPS12V
connector, which can provide twice as much 12VDC current and is really just
two ATX12V connectors side by side.
Some power supplies, including the CP-850 we're using, provide both ATX12V
and EPS12V connectors. Others do not provide an EPS12V connector, but pro-
vide two ATX12V connectors, which can both be plugged into a motherboard
EPS12V connector to provide the necessary current. If your power supply pro-
vides only one ATX12V connector, it cannot be used with a motherboard that
requires an EPS12V cable.
Ron Morse Comments
The vendor may have included a
four-pin Molex-to-AXT12V converter
with the other accessories in the box.
Locate the EPS12V cable in the bundle of cables coming out of the power sup-
ply. Route it out through the right side of the case and back into the mother-
board chamber through the same cutout you used for the 24-pin main ATX
power cable. The EPS12V motherboard jack and EPS12V cable connector are
keyed. Align the keys properly and press the cable connector down firmly until
it seats in the motherboard jack, as shown in Figure 5-45. Verify that the latch
on the cable connector snaps into locked position over the tab on the side of
the motherboard jack.
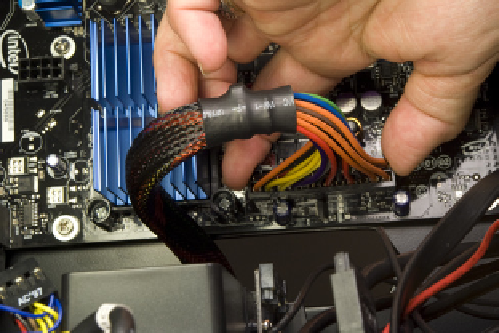
Figure 5-44.
Align the main ATX power cable connector with the
motherboard jack and press down until it seats completely
Figure 5-45.
Align the EPS12V power cable connector with the
motherboard jack and press down until it seats completely