Hardware Reference
In-Depth Information
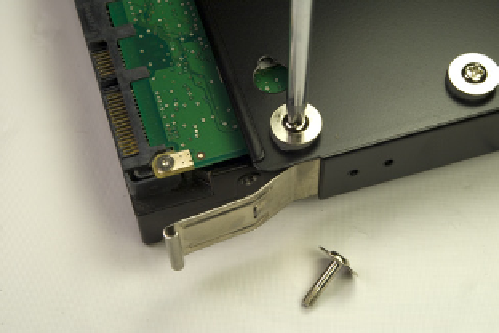
tray so that the mounting holes in the hard drive are visible through the grom-
mets in the drive tray. Locate the special hard drive mounting screws in the parts
box. (One of these screws is visible at the lower center of Figure 4-14.) Drive four
of these screws through the grommets and into the drive, as shown in Figure
4-14. Tighten the screws only finger-tight plus perhaps a quarter turn. Over-
tightening the screws reduces the isolation benefits of the grommets.
Orient the drive tray so that the solid base of the tray will be on the bottom
when the drive cage is reinstalled. Slide the drive tray into the drive cage and
press straight in until both spring clips snap into place, as shown in Figure 4-15.
Figure 4-14.
Secure the hard drive to the drive tray by driving four
of the special hard drive mounting screws through the grommets
Figure 4-15.
Slide the drive tray into the drive cage until the spring
clips snap into place
We're running neither a hot video adapter nor a hot processor, so we decided
to leave both drive cages installed. We're only installing one hard drive, at least
for now, so we decided to install it in the upper removable drive cage, leav-
ing the more accessible lower cage available for easier later upgrades. If you
decide to use the upper hard drive cage, you'll find it a bit harder to install the
drive(s) because they're unsupported and more difficult to keep aligned until
you drive in a couple of screws to secure them.
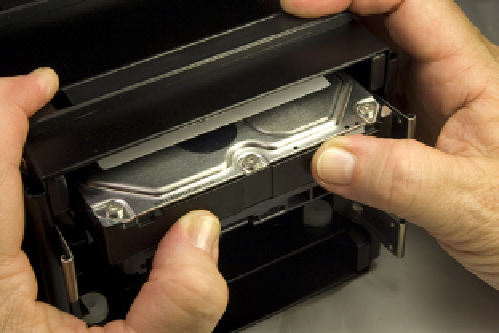
Place the drive cage on its side and use one hand to support the drive and
line up the top two screw holes in the drive with the holes in the grommets.
Drive in two of the special screws (visible in Figure 4-16) to keep the drive in
position. Invert the drive cage to place the unsecured side of the drive on top,
as shown in Figure 4-16. Nudge the drive back and forth until one of the screw
holes aligns with a grommet hole and drive in that screw. Repeat that process
with the fourth screw.
Once the hard drive is installed in the drive cage, set both drive cages aside for
now. We'll reinstall the drive cages after we install and connect the motherboard.
The next step is to install the optical drive. Antec recommends installing it, if
possible, in the top 5.25” external drive bay. To begin, use your index fingers
to grasp the sides of the plastic drive bezel and twist it until it snaps out, as
shown in Figure 4-17.
Figure 4-16.
Use four of the special hard
drive screws to secure the hard drive
directly to the upper drive cage