Hardware Reference
In-Depth Information
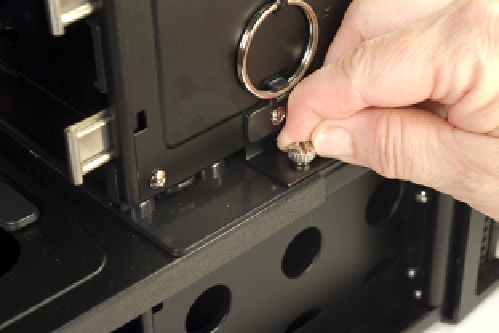
Figure 4-10.
Remove the thumbscrews that secure the drive cages
Figure 4-11.
Pull the drive cages straight out of the chassis
The Antec Mini P180 manual claims that the parts box concealed on the right
side of the upper 3.5” drive cage contains screws, spare grommets, standoffs,
and so on. We'd already located those in the white cardboard box in the lower
chamber, so we wondered what we'd find in that parts box. Figure 4-12 shows
its contents. Yep, absolutely nothing.
Still, keep that parts box in mind. Once you finish assembling the system, you'll
have lots of leftover screws and other parts that you might need later. Ordinar-
ily, we store those in a plastic bag taped to the floor of the case. The parts box
is a neater way to store small spare parts.
Now, decide which drive cage you want to use. Directions follow for using either.
To install a hard drive in the lower drive cage, place the cage on a flat surface
and remove one of the drive trays by squeezing both spring clips and sliding
the drive tray out of the cage, as shown in Figure 4-13.
Figure 4-12.
The parts box on the upper drive cage is a good place
to store excess small parts
Figure 4-13.
Squeeze both spring clips and slide the drive tray out
of the lower drive cage
Place your hard drive inverted (circuit-board side up) on your work surface. Place
the drive tray inverted on top of the drive, with the spring clip ends of the drive
tray toward the data and power connector end of the hard drive. Align the drive