Hardware Reference
In-Depth Information
The processor should seat flush with the socket without any pressure being
applied.
Never press down on the processor, or you may bend the proces-
sor pins and ruin it.
If the processor doesn't drop into the socket freely, it's not
aligned properly. Realign it and try again until it drops easily into the socket
and seats completely.
A Penny Saved Is a Hundred
Dollars Wasted
If you ever remove and replace the
processor, don't attempt to reuse
the thermal compound. Rub off any
compound present on the processor
surface and the heatsink base—if it's
tenacious you can warm it slightly
with a hair dryer—and then polish
both the processor surface and the
heatsink base with a clean paper
towel to remove all traces of the
old compound. Apply new thermal
compound according to the instruc-
tions supplied with it. (We generally
use Antec Silver thermal compound,
which is inexpensive and effective.)
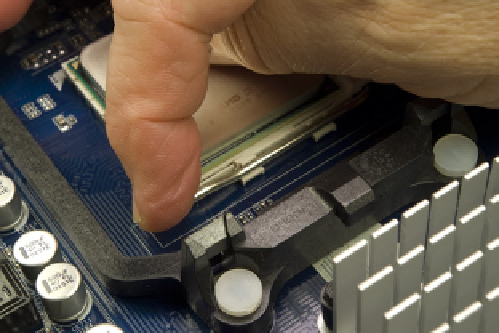
Once the processor is seated properly, press the metal cam lever downward
toward the socket and snap it into position under the plastic locking tab on
the socket, as shown in Figure 3-19. You should feel some resistance on the
lever as the cam clamps the processor pins into the socket. If you feel any more
than very slight resistance, release the pressure, verify that the processor is
correctly seated, and try again.
After you install the processor, the next step is to install the CPU cooler. Before
you install the cooler, examine the bottom of the heatsink to verify that the
patch of thermal compound is present and undamaged.
The CPU cooler clamps to the processor socket with two metal brackets that fit
over plastic tabs on opposite sides of the processor socket. One of the brackets
is free-floating. The other has a latching lever that cams the CPU cooler into
tight contact with the processor. You can place either bracket over either tab,
but it's easier to use the latching bracket on the tab nearest the edge of the
motherboard, where there's more room to maneuver.
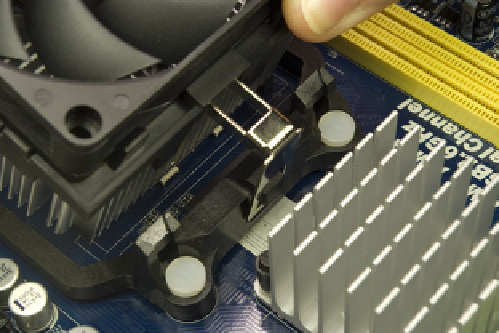
Locate the latching bracket on one side of the CPU cooler. Tilt that side of the
CPU cooler slightly up from the processor surface, and hook the free-floating
bracket over the black plastic tab on the edge of the processor socket, as
shown in Figure 3-20. Make sure the hole in the bracket catches the tab, and
then lower the other side of the CPU cooler until its base is in full contact with
the processor. (You may have to use your finger to hold the bracket in place.)
Figure 3-19.
Press the cam lever down and snap it into place under
the plastic locking tab on the processor socket
Figure 3-20.
Hook the free-floating metal bracket over the black
plastic tab on the processor socket
Making sure that the first bracket remains connected and maintaining finger
pressure to keep the CPU cooler in position, press the second (cammed) brack-
et into position over the second tab, as shown in Figure 3-21.