Graphics Reference
In-Depth Information
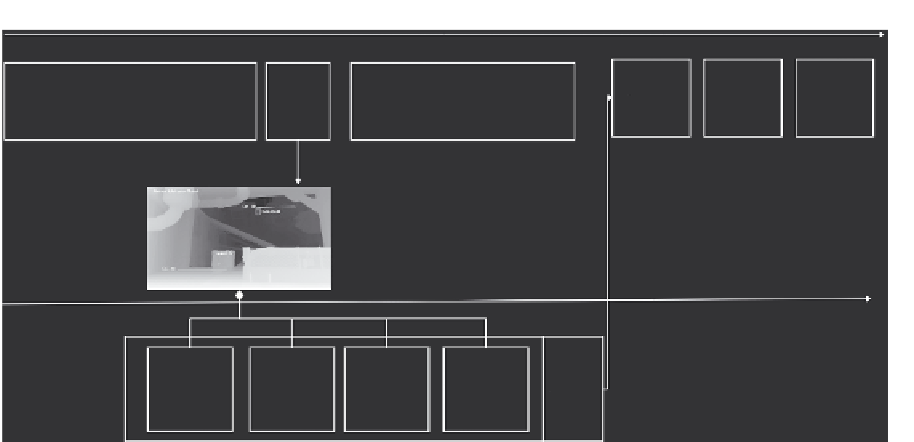
RSX
Bokeh frame
buffer
transfer
to main
memory
Display Bokeh
UI
Persent
Render frame color buffer
PostFx
SPU
Bokeh sprite
buffer 1
Bokeh sprite
buffer 2
Bokeh sprite
buffer 3
Bokeh sprite
buffer 4
SPU Patch
JTS
Figure 3.9.
Bokeh effect timeline example.
The effect is very similar to the bokeh effect available from the DirectX 11
API, using the compute shader.
Let's detail the different steps (see also Figure 3.9):
1. Transfer the color buffer to main memory. You can transfer at full resolution
or half resolution depending on the budget or quality of the bokeh effect
you want.
2. Prepare (
n
) SPU jobs working on a sub-part of the color buffer to analyze
the pixel luminance.
3. Each SPU fills a vertex buffer with the bokeh sprite information.
4. On the PPU, reserve space in the command buffer for the
SetDrawArrays
.
Since the command
SetDrawArrays
has a variable size in the command buffer
depending on the number of vertices, we must declare a maximum number
of vertices and reserve that space in the command buffer. JTS commands
are inserted before each
SetDrawArrays
so that the RSX waits until the SPUs
are done.
5. On the PPU we issue (
n
) draw calls working on (
n
) vertex buffers depending
on the number of SPU jobs we decided to spawn to process the framebuffer:
for example, if we decided to create two SPU jobs, both jobs would work on
half of the framebuffer, and we would need to issue on the PPU two draw
calls each using their own vertex buffer (so two vertex buffers) and patched