Geography Reference
In-Depth Information
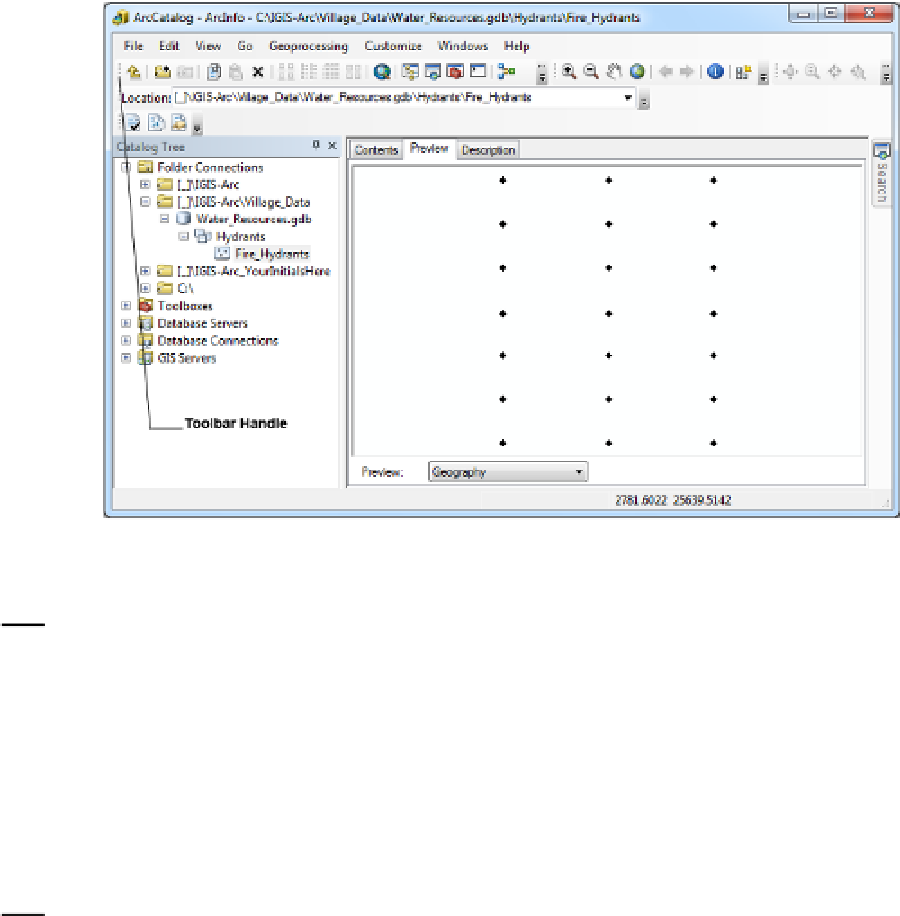
Hydrants. Expand. Select Fire Hydrants. Press the Preview tab at the top of the right-hand pane.
In the pane, you will see the points that represent the hydrants in Village Data.
14.
Under Customize > Toolbars, make sure the Standard, Geography, Location, and Metadata
toolbars are all turned on. Active toolbars have a check to the left of their names.
FIGURE 1-21
15.
Locate a subtle column of three or four dots at the extreme left of the Standard Menu bar.
Consult Figure 1-21 to see where this “toolbar handle” is. Using that handle, drag the toolbar
to the upper left of the right pane. Also use this technique to drag each of the other toolbars
so that the window resembles Figure 1-22. By “undocking” the toolbars in this manner, you can
see the name of each. (When the toolbars are docked, the names are hidden to save space.)
Also move the Catalog Tree by dragging it by its top. Notice the various icons that appear as you
drag the Catalog Tree. Experiment with the options offered by dragging the mouse pointer to an
icon as you drag the Catalog Tree. Another experiment: turn the tree off by clicking the “X” in
its upper-right corner. Turn it on again by clicking the Catalog Tree icon in the Standard Toolbar.
Re-dock it in its original position by dragging its title bar into the furthest left-hand arrow.
16.
Run the mouse pointer over each of the buttons on the Standard toolbar. Notice that, if you
pause for a second or so over an option its name appears—possibly with a description,
depending on the version of the software you are using. In version 10.0 of the software you can
see an instantaneous and more complete description of the tool by looking at the Status Bar at
the bottom of the window.
The Standard Toolbar provides icons that let you perform frequently used actions. Of course, as with
many software packages, there are often several ways to perform an action. Some of these alternative
procedures are also given.


Search WWH ::

Custom Search