Geography Reference
In-Depth Information
Contrast these values with those you wrote previously, and you will see that you have genuine areal
polygons that don't overlap.
14.
Click Save Edits, then Stop Editing. Dismiss ArcMap.
Using Topology to Remove Overlaps from the
Feature Class
Here we explore a second way of disentangling these two polygons. We make use of the topology rules
that accompany geodatabases.
15.
Back in ArcCatalog, highlight UTM_Zone_2 in the Catalog Tree. Select File > New > Topology.
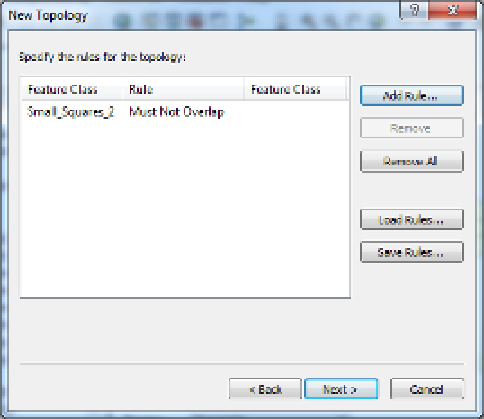
Read the discussion in the New Topology window. Click Next. Name the new topology
Squares_Topology. Click Next again. For the feature classes that will participate in the topology,
select (with a check box) only Small_Squares_2. Click Next. Since only one feature class will
be involved, there is no need to change the rank values. Click Next. Add the rule Must Not
Overlap. The New Topology window should look like Figure 5-14. Click Next. Read the summary.
Click Finish After a little computation you will be asked if you want to validate the New
Topology. Click Yes.
FIGURE 5-14
16.
Launch ArcMap with a Blank Map. Add as data Squares_Topology. When asked if you also want
to add the feature classes that participate in the topology, select Yes.
17.
Polygons with errors are shown with red borders. Areas of overlap are shown with pink. Turn the
two entries in Layers off and on so you can get an idea of what is being shown. (If both are off
and there is still an image in the map pane, press the Refresh View button at the lower left of
the map window.) Turn both on.


Search WWH ::

Custom Search