Geography Reference
In-Depth Information
FIGURE 5-3
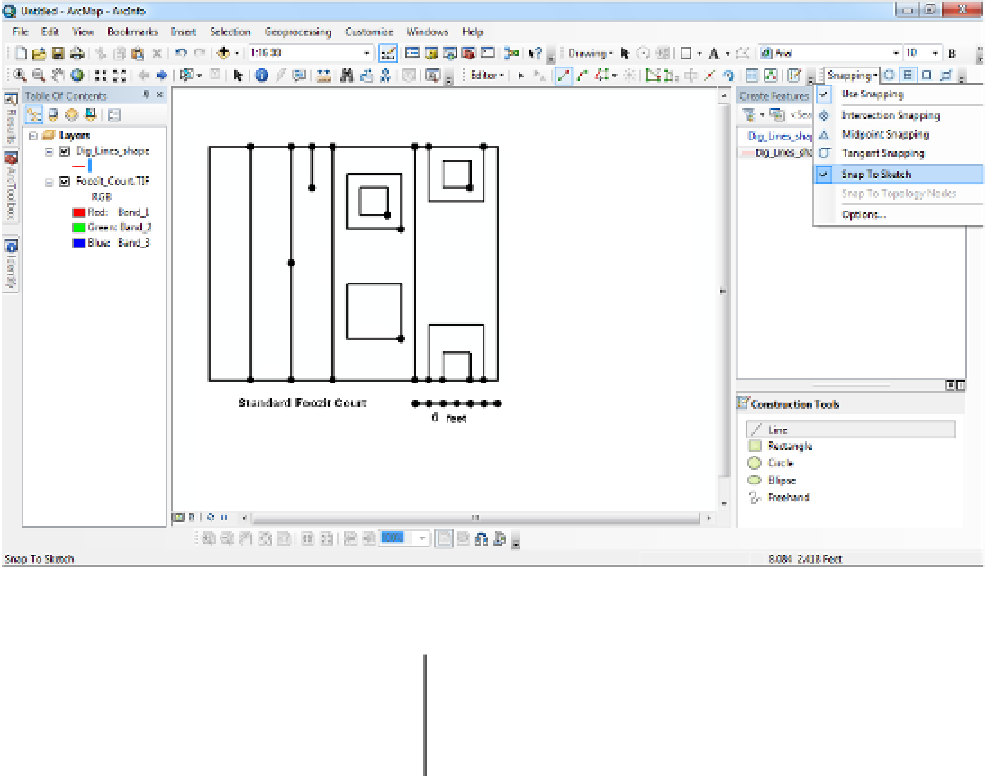
FIGURE 5-4
digitizing. First you will form the three of the segments of the leftmost rectangle. Put the cursor
in the center of the black disk (as shown in Figure 5-4). Now click once and you will create
a starting vertex in Dig_Lines_shape. Move the cursor to the left to the place where the line
changes direction (at the corner of the court), and click again to create a second vertex. Create
the next vertex at the northwest corner of the court. Create the ending vertex (at the northwest
dot), again by clicking once, then pressing F2 to complete the sketch of the polyline. Notice the
bright cyan line that indicates the polyline that you have digitized.
13.
Begin the second polyline at the southern endpoint of the first polyline. Notice when you move
the cursor near the already existing endpoint, the cursor displays the four-square grid, indicating
it will snap to an endpoint. This is the effect of snapping. Notice also the Snap Tip. What does
it say? __________________________________________. Since you set the snapping tolerance
to 10 pixels, this effect occurs when you get within 10 screen pixels of an existing endpoint.
When you click you get a little red circle at the endpoint and you may begin the new polyline.
Move the cursor to the northern end of the line. Instead of using a single click followed by F2 to
end the sketch, use a double-click on the northern point.


Search WWH ::

Custom Search