Geography Reference
In-Depth Information
Ignore it.) Right-click the feature class name in the T/C and choose Properties.
7
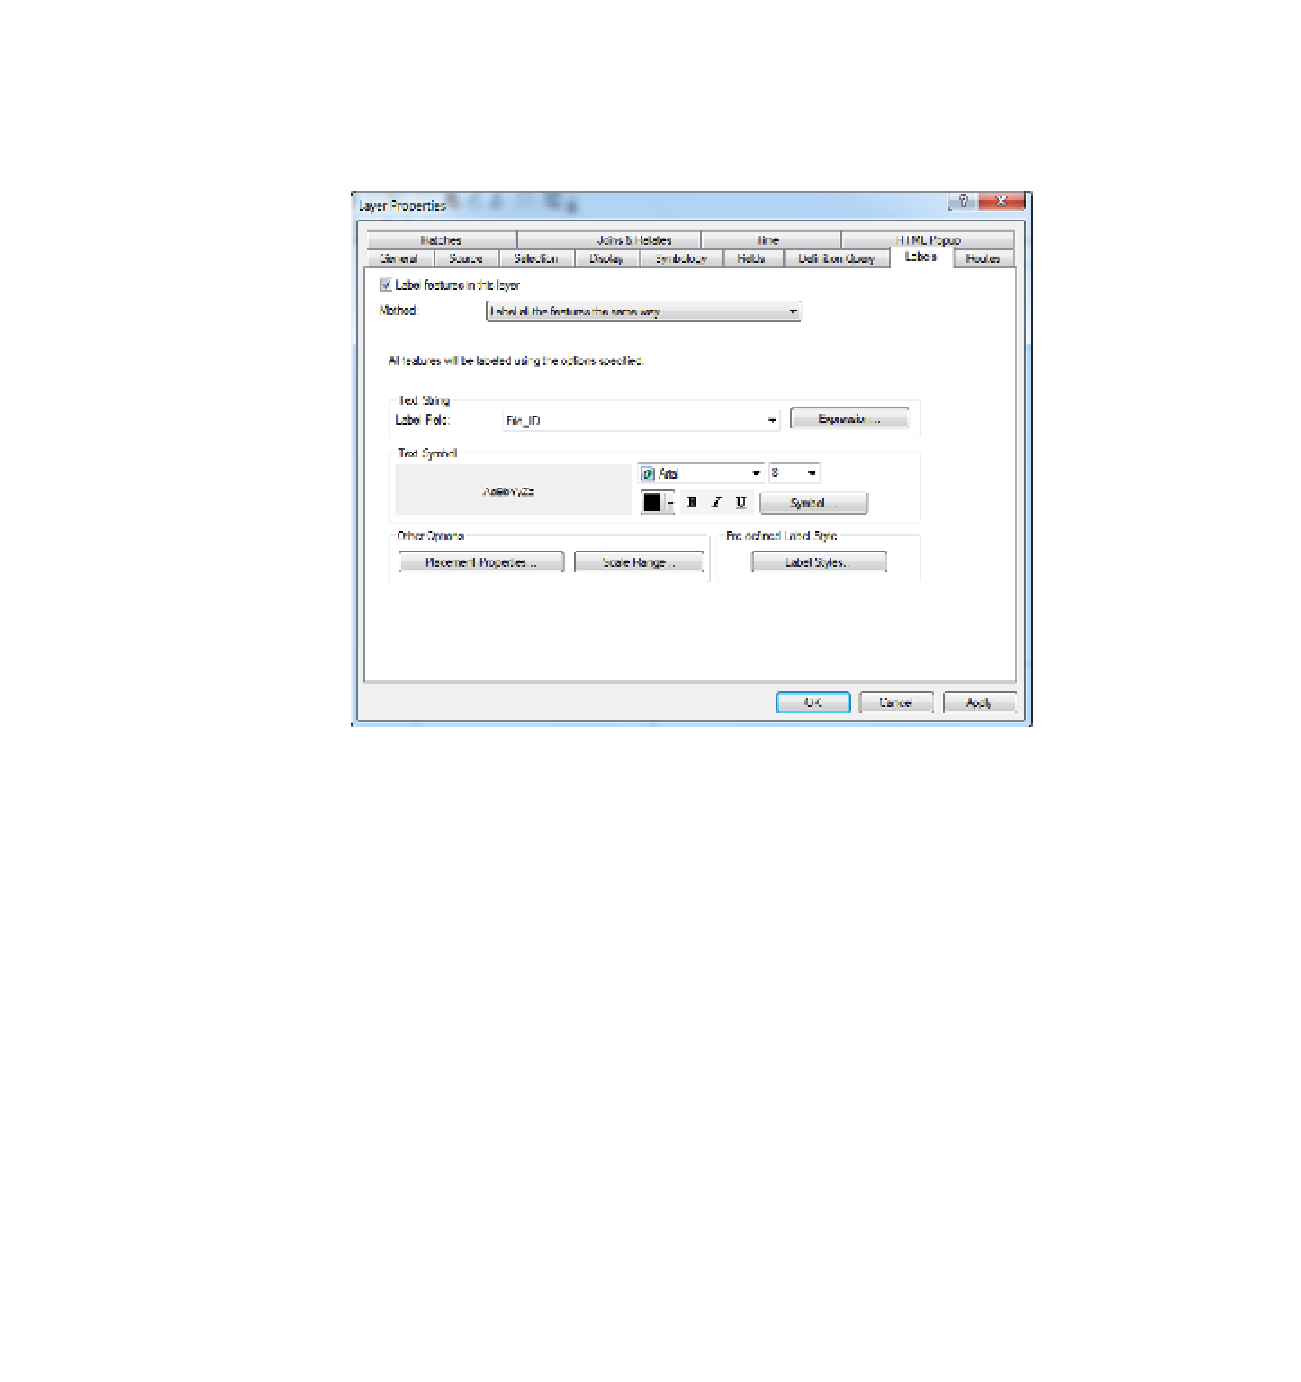
Pick the Labels
tab. As the Text string Label Field, choose File_ID. If necessary place a check in the box Label
Features in this layer. Your Layer Properties window should look like Figure 4-18. Click Apply,
then OK.
FIGURE 4-18
10.
Your map should now look like Figure 4-19. The lines will have the identification numbers that
you provided in the text file—that is, 101, 102, and 103. But you notice something peculiar:
labels 101 and 102 seem to be on the same line. Well, they aren't. There are two lines there:
one belonging to the leftmost polygon and the other belonging to the adjacent polygon. ArcMap
is bright enough not to put one label on top of another, but not bright enough to differentiate
one line from the other. Use the Identify tool to determine which line is which. (Hint: Click on a
line other than the vertical line. In moving the Identify window around and then zooming to the
layer, ArcMap may move the labels so they make more sense—but it also might not.)
Now you might be thinking, “Isn't having two identical lines dividing the polygons a waste of computer
storage? Not to mention that I had to type in almost twice as many vertices.” Actually, there are good reasons
for this duplication, and as we talk later about topology and topological errors, these reasons will become
apparent. (There is the older data structure—the coverage, with which you had a passing acquaintance
in Chapter 2—that uses single lines to separate polygons. If you are interested in the data structure of
coverages, you may take a look at the file Discussion of Coverages from the 1st edition, found on the
DVD that accompanies this topic.
7
If your T/C disappeared you can restore it with Windows > Table Of Contents.


Search WWH ::

Custom Search