Hardware Reference
In-Depth Information
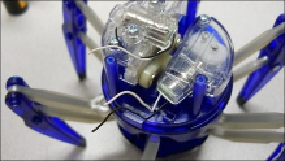
2. You'll want to add extension wires onto each of the six wires, so you can connect
them to the TinyDuino that you'll mount on top of the robot. Once you have done
this, route these wires out the hole to the left by removing the small controller
board, and then reattach the top of the robot and the top plate.
3. You'll mount your TinyDuino and the associated shields on the top of the robot.
You can do this by mounting the TinyDuino shields together using the TinyDuino
mounting kit available at
tinycircuits.com
.
However, you'll first want to solder
some wires to the proto shield so that you can talk to the other sensors you'll want
on the robot. For this project, you'll need to control two DC motors and the sonar
sensor. The specifics for the sonar sensor were covered in
Chapter 8
,
Avoiding
Obstacles Using Sensors
. Based on this information, you'll need access to pins 9
and 10 for the two motors and VCC, GND, and pins 12 and 11 for the sonar
sensor.
4. You'll need to solder wires to the proto shield. The following is an image of the
shield, which will give you an indication of where to add the wires: