Hardware Reference
In-Depth Information
2. Then, unscrew the screw at the center of each horn connected to the servo, and
turn it so that it is now in the middle location on the robot for that particular
servo.
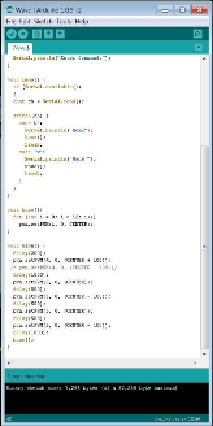
When your robot is centered, you can now begin to program your robot to do things. First,
let's add a command that waves one of the front legs. From the Arduino sketch, change
your
loop()
function, and add the
home()
and
wave()
functions, as shown in the
code snippet in the following screenshot:
The code is very simple; the
setup()
function establishes your access to the servo
shield and the loop simply takes in a command from the serial port, and when it sees from
the Serial Monitor tab, it moves the front leg up and down three times.
You can really take advantage of the SW that is available out there, as there is a set of SW
capabilities that have been created by enterprising individuals that will allow your quad-
ruped robot to do a number of different actions based on the input from the serial port.
One example is at
letsmakerobots.com/node/35354
and another at
blog.oscarliang.net/