Hardware Reference
In-Depth Information
Connecting a DC motor directly to
Arduino
The first step in connecting a DC motor to Arduino is to actually obtain a DC motor. The
motors that you will be dealing with here are simple, small DC motors. The motors must
not require much current because Arduinos cannot supply more than 40 mA of current dir-
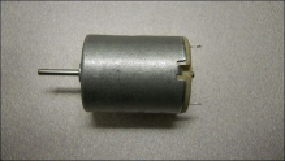
ectly. For this example, you can use a small 6 V DC motor available at most electronics or
hobby stores. The following figure shows one such motor:
In order to connect this motor to your Arduino, you'll need some additional parts. You'll
need two male-to-male solderless jumper cables and two alligator clip jumper cables. You'll
also need a transistor, a TIP120 to be specific. In this case, the transistor will act like an
electronic switch; when you send a control signal to it, the power will flow from the bat-
tery. You'll also need a diode, the 1N4004 diode. The diode is a device that protects from
reverse power flow. You'll need a 1000 ohm resistor; this will translate the control signal
out of Arduino to the proper current for the transistor.
You'll also add a 1 microfarad ceramic capacitor; this capacitor filters out some of the
switching noise that can appear on the wires that control the motor. These last four parts
should be available at almost any electronics store or online. These parts should be very in-
expensive. To control this motor, you'll connect one motor connector to digital pin 11 and
the other connector to GND on Arduino. You could use one of the voltage sources on Ar-
duino, but some DC motors can draw lots of current, more than what our Arduino can sup-
ply. A safer way is to connect the DC motor supply to a battery holder with four AA batter-
ies.