Java Reference
In-Depth Information
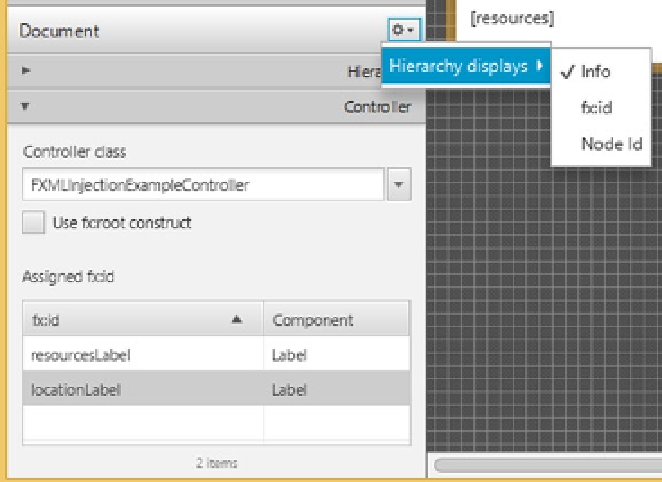
There is a menu button in the top right corner of the Document Panel. It contains a Hierarchy Displays submenu
that has three menu items, as shown in Figure
3-26
. The Info menu item causes the Hierarchy section to display each
node with its general information, usually what is also displayed in the Content Panel for the same node. The fx:id
menu item causes the Hierarchy section to display each node with its fx:id if it has been set. The Node Id menu item
causes the Hierarchy section to display each node with its node ID if it has been set. The node ID is used by CSS to
find the node and to manipulate the node's styles.
Figure 3-26.
The Document Panel with its menu open
Understanding the Content Panel
The Content Panel is where the UI is composed. You first drag a container to the Content Panel. You then drag other
nodes to the Content Panel and position then onto the container node. As you drag your nodes, red guidelines will
appear as the node you drag reaches certain alignment and spacing positions. With the help of these guidelines, you
should be able to create visually pleasing UIs.
Above the Content Panel, there is a bread-crumb bar that shows the path of the selected node in the content area.
This allows you to easily navigate to the containing nodes of the currently selected node. JavaFX SceneBuilder will
display warning and error messages in this bar when the situation arises.
One handy feature of JavaFX SceneBuilder is that when you have several nodes selected, you can go to the
context menu by right-clicking the selected nodes, choosing the Wrap in submenu, and then selecting one of the
container types. You can also Unwrap a node this way, removing any containers that contain the node.
Figure
3-27
shows the
IncludeExampleTree.fxml
file from Listing 3-20 being edited in JavaFX SceneBuilder.
Search WWH ::

Custom Search