Hardware Reference
In-Depth Information
A New Stop It
Building on top of other working projects is a great way to help simplify the development of more complex projects.
The game for this section takes the idea of Stop it and expands it into the second dimension. The new game, called
Stack It, as almost the same challenge as Stop It, but instead of requiring the player to stop a scrolling LED, Stack it
uses scrolling sprites that need to be stopped when the current moving sprites are in the same position as the past
sprites. Stack it speeds up and moves to the next level up the screen instead of displaying the level between each win.
There are two mechanisms of difficulty:
•
The speed of the row
•
The number of sprites that need to be matched
If the player misses the position of the previous row, the game removes sprites for the next level until the player has
no more sprites left to play. Figure
11-2
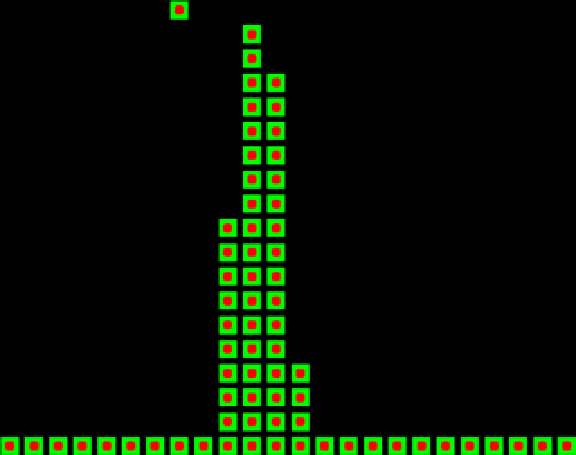
shows the game play of Stack it with the last level still in play. The first level is
always a gimme; it allows the player to decide where to start the stack and then continue through 16 levels to a big win.
Figure 11-2.
Stack it's game play
The hardware setup for Stack it includes the Gameduino and a button; Figure
11-3
shows the setup for the
Arduino. You need to plug the Gameduino into the Arduino, making sure to align the pins and one lead of a button
connected to ground, and the other lead connected to pin 2 in the headers of the Gameduino. The Gameduino only
uses digital pins 9, 11, 12, and 13. Pin 9 is the slave select and is unavailable for any other function. Pins 11, 12, and 13
are the standard SPI connections and can be used to connect other SPI devices, such as SD cards. The power for the
Gameduino comes from the 3.3V, 5V, and ground of the Arduino and requires no extra connectors. The Gameduino
can be connected to a monitor or a television with a VGA port.