Game Development Reference
In-Depth Information
Caution
Moving resources to different folders, or even renaming them, will
cause SpriteBuilder to lose any existing references to that resource. It is crucial
to create resources in the right place and therefore to come up with a sound
folder structure for the given project as early as possible, and then stick with it.
Resource files should be in an appropriate location and named appropriately be-
fore making first use of them. It's not impossible to move or rename resource
files at a later time, but the more often you have used that file, the more changes
you'd have to make to update references so they point to the new path or name.
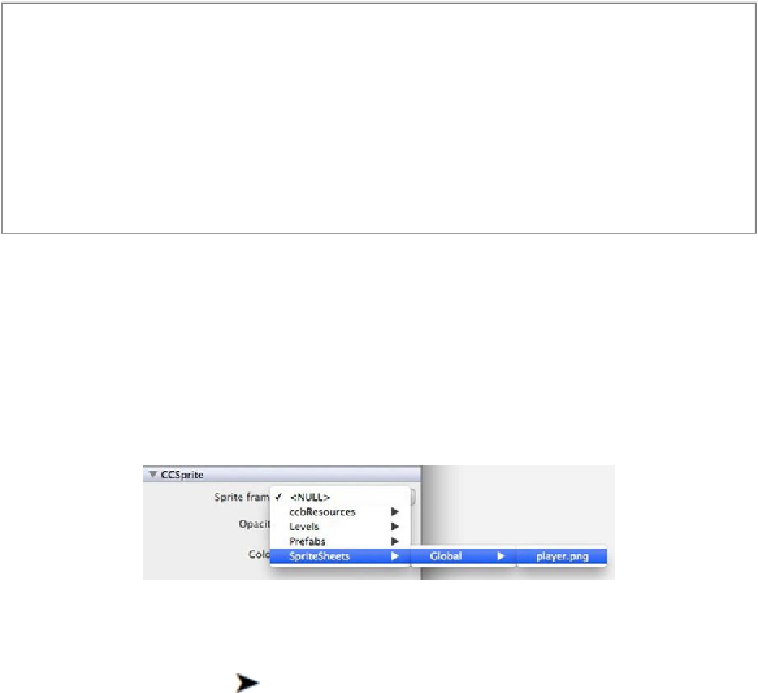
The Player.ccb in its current state is a seemingly empty, black void. Click the CCSprite
root node in the Timeline below the stage, or select the sprite by clicking in the center of
the stage. You should now see a circular selection in the stage with the four selection
handles, and the Item Properties tab on the right should show the sprite node's properties.
Currently, the
Sprite frame
property is set to <NULL>, and that's why you're not seeing
anything. Click on the Sprite frame drop-down menu, and change it to the player.png in
the Global sprite sheet folder as seen in
Figure 2-28
.
Figure 2-28
.
Selecting the correct Sprite frame image for the player
Now the player.png image should be displayed on the center stage. For now, that's it for
the Player.ccb. Choose File
Save All or File
Publish to allow SpriteBuilder to up-
date the project's preview images.
Creating an Instance of the Player Prefab
Now double-click the Level1.ccb to open it. Switch to the Tileless Editor View (the
second tab from the left). You'll see the player listed multiple times in the Tileless Editor
View like in
Figure 2-29
.

Search WWH ::

Custom Search