Game Development Reference
In-Depth Information
The results will look something like in
Figure 12-8
. A darker, scarier, and pixellated ver-
sion of the background.
To create this effect, select the
CCEffectNode
in the Timeline and switch to the
Item Prop-
erties
tab.
You'll notice the
CCEffectNode
section at the bottom of the
Item Properties
tab shown in
Figure 12-8
.
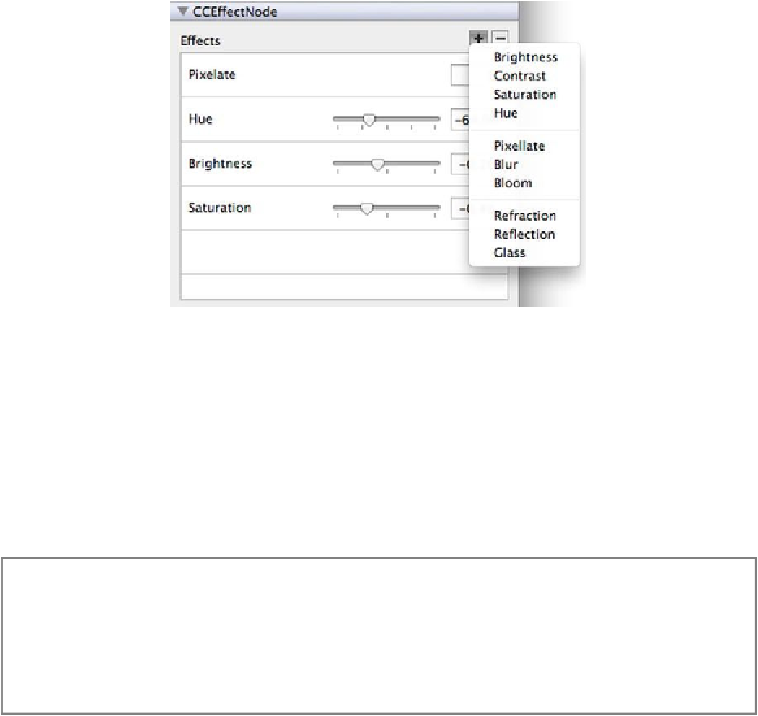
With the [+] button, you will open a context menu from which you can
choose one effect to add to the list. At the time of this writing, there are a total of 10 ef-
fects, as seen in
Figure 12-9
.
Figure 12-9
.
Adding an effect
To create the effect seen in
Figure 12-8
, add
Pixellate
,
Hue
,
Brightness
, and
Saturation
ef-
fects. The order in which you add these effects doesn't matter, although it may make a dif-
ference for other effect combinations.
The
Pixellate
effect should have a value of
5
,
Hue
a value of -64,
Brightness
a value of
-0.2, and
Saturation
a value of -0.4. Feel free to alter the values as you see fit. You can
also add additional effects if you want.
Note
In the SpriteBuilder version I used, you can add the same effect multiple
times. This does not make sense for most effects. For instance, using
Pixellate
multiple times will make a difference only if each effect uses a different pixella-
tion value (say: 3, 5, and 8), and the result will look barely any different from
using a single
Pixellate
effect with a value of
8
in this example.
Search WWH ::

Custom Search