Game Development Reference
In-Depth Information
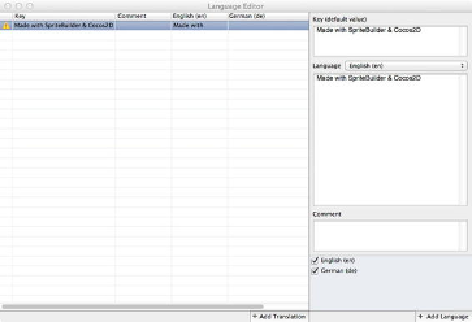
Figure 11-10
.
The initial localization dialog with just one string and one language
The very first thing you need to do when adding localized strings is add one or more lan-
guages. Click the
+Add Language
button to bring up a drop-down list of possible lan-
guages. You can use any language you like. I went with German because that's what I
grew up with. After adding a language, it will appear in the list at the bottom right. But
adding a language also adds another column to the text grid view on the left. And it places
a yellow exclamation mark icon to the left of the
Key
column, because for the given
Key
,
there is no German translation yet. See
Figure 11-11
.
Figure 11-11
.
After adding German as a language, the columns are updated and the warning icon indicates
missing translation text
Now all you have to do is to enter text in the
German (de)
column for the only string
that's currently in the localization dialog. Enter the following as a possible German trans-
lation (without quotes): “Entwickelt mit SpriteBuilder & Cocos2D”. Be sure to enter the
string in the
German (de)
column. If you've done this correctly, the warning icon should
be gone.
You can leave the
Comment
field empty. It can be used to leave notes for the translators,
perhaps to mention the maximum number of characters this string must not exceed in any
language.
Note that you can and should change the entry in the
Key
column, mainly to prevent you
from accidentally editing the key where you meant to enter an actual language string. I
Search WWH ::

Custom Search