Hardware Reference
In-Depth Information
Putting It All Together
The I2C bus is not that hard to work with, as you can see. With the above knowledge in mind let's connect that LCD to
the Raspberry Pi. You're going to need only a few parts for this project. I did tell you the I2C bus was simple. Here is a
listing of parts you will need:
•
At least 12 pieces of hook-up wire
•
One breadboard and some jumper wire
•
One shift register (I use the Texas Instruments PCF8574AN)
•
A 5-V source and 3.3-V source
•
One HD44780 or clone character LCD
•
Pin headers for your LCD (optional)
In Figure
4-10
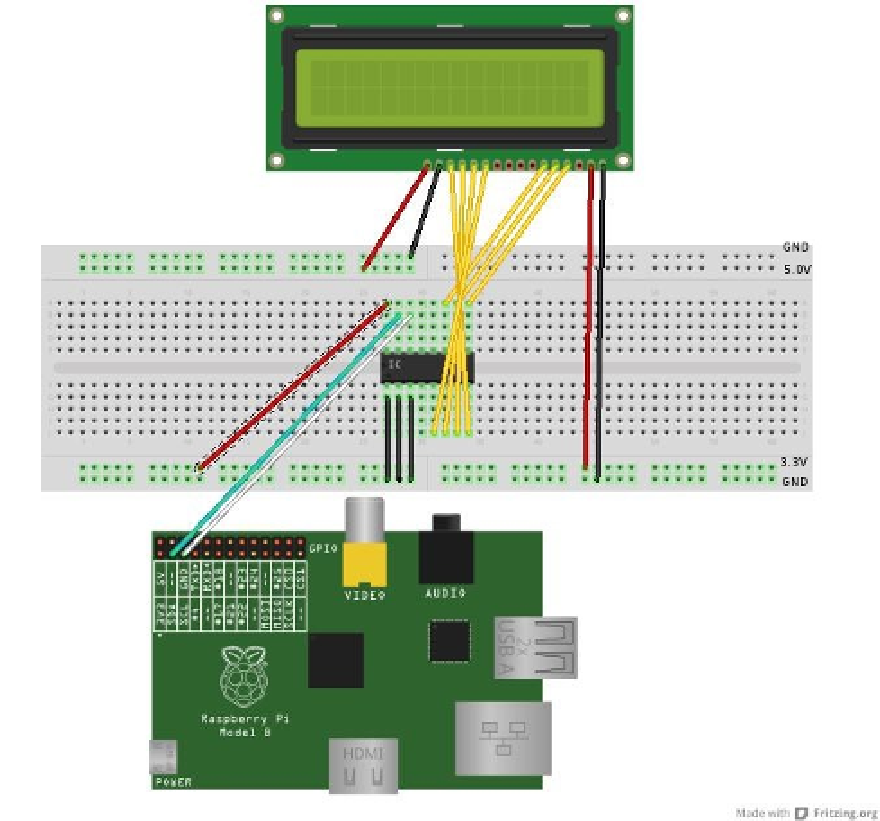
you can see what the finished project breadboard should look like. I have used my handy USB power
source to give me 3.3 V and 5 V on each side of the breadboard. Now that you can see what it should look like, let's take
a look at the schematic version of this. In Figure
4-11
you can see the electronic wiring schematic for this project.
Figure 4-10.
A mockup of the finished breadboard