Hardware Reference
In-Depth Information
Once you are done, go to the checkout and fill in your details. At the moment, the only payment method is
PayPal. In the last step you will be redirected to PayPal to provide payment. You're going to need to wait for the good
people at the foundation to generate your keys and e-mail them back to you. This process can take up to 72 hours so
please be patient.
You should receive at least two e-mails from the foundation.
•
The first e-mail will come with a PDF. This PDF will contain instructions for how to use the
licenses without license codes.
•
Next up you should get an e-mail that will contain the actual license codes. The license codes
will have the following format:
decode_MPG2=0x000000
Now that you have your license how do you install it? The license needs to be read by the firmware on boot of the
system. With that in mind, there is only one file that meets this need and that is the
config.txt
on the primary FAT
partition of your install. Keep in mind that these keys had needed more recent firmware around August 2012 and the
above should be fine. Because you are using the latest version of OpenELEC, this won't be an issue.
The licenses are also applicable to any operating system that can use the underlying hardware. All you are
doing is activating a feature of the hardware. There are many ways you can edit the
config.txt
file. You can edit
this file on any machine that has an SD card slot. You could even mount the
flash
partition from inside a booted
operating system on the Raspberry Pi. You will need to edit this file from another PC, because you have not booted up
OpenELEC yet.
1.
Mount up the boot partition of OpenELEC on your host system.
2.
Insert the SD card back into the host system and search your
dmesg
output as you have
done before; this will be the first partition on the SD card you have just created and it will
have a label of
SYSTEM
.
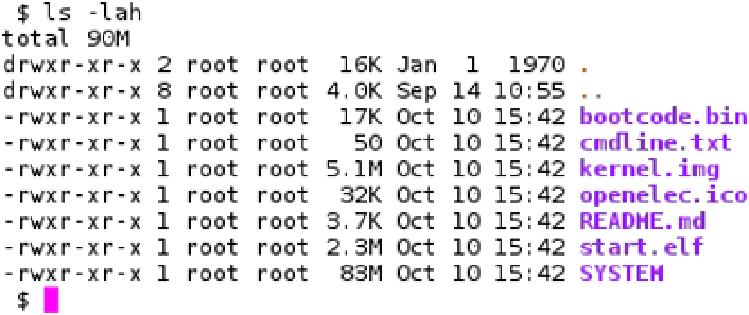
Well, look at that, in Figure
7-6
you will notice there is no
config.txt
file!
Figure 7-6.
First partition in OpenELEC
You're going to need to create this file if it's not already there (and it might be on some builds). Open up your
favorite text editor. After you have this file open, add the license keys into the file if you already have a
config.txt
file
that you have created. Then all you need to do is add the two
decode
lines to the end of your file and then save and
reboot the Raspberry Pi. You can see in Figure
7-7
where I have added the two license keys.