Database Reference
In-Depth Information
▪ The Notes field will be anchored on all four sides. It's the one field that holds a lot of in-
formation, so it benefits the most from the extra space.
Here's how to make it happen:
1.
Select the First Name, Last Name, Phone Number, Street Address, City, and
Email Address fields. Also select the light area of the header (under the Search
field)
.
It's probably easiest to press Shift and then click the fields one by one. The fields
should all be encompassed in a set of selection handles.
2.
If the Inspector isn't showing already, choose View
→
Inspector and then select
the Position tab
.
3.
In the Autosizing section, turn on the right anchor checkbox
.
The top and left anchors are already on (if they aren't for some reason, then turn them
on so that the top, left, and right anchors are all on).
4.
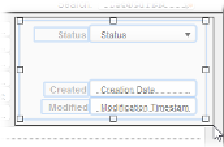
Using the rubber-band technique, drag a box around the status, date, and
timestamp fields, and their three labels.
Figure 8-25
shows how to do this. Addi-
tionally, select the Search field and its label
.
Now the collection of fields and labels on the right side of the layout are all selected.
Figure 8-25. To select several objects that are close together, you can rubber-band them.
Just click above and to the left of the objects and then drag down and right until they've all
been touched by a side of the box. When you release the mouse button, everything the box
came into contact with is selected.
5.
In the Autosizing controls, turn off the left anchor, and turn on the right anchor
.
Once again, the top anchor should already be turned on, so make sure you have just
the top and right anchors in play.
6.
Select the State and Zip Code fields and then anchor them to the top and right
.
7.
Select the Notes field and then turn on its bottom and right anchors
.