Database Reference
In-Depth Information
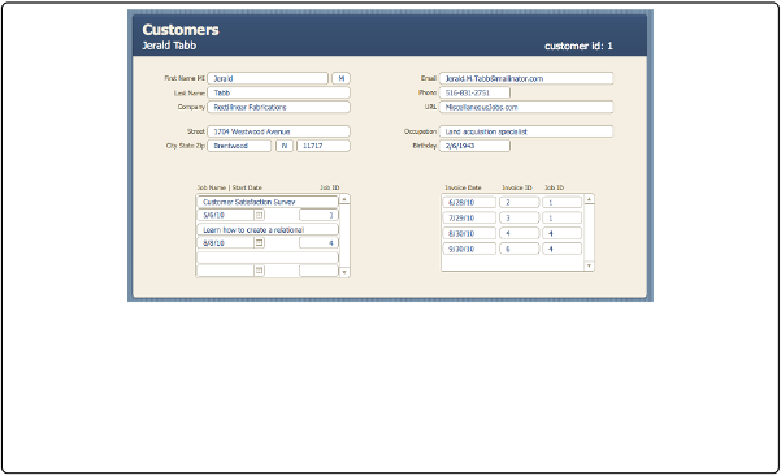
Figure 5-16. The sample database for this chapter has been set up with data so you can focus on
the relationship you're creating. To see the relationships working, make sure you're viewing the
first few records in each table. Here's the first Customer record, showing one way you can arrange
the new Jobs and Invoices portals you'll create as you work through the next sections. You may
find it helpful to compare the finished version of the database to your work to see how all the pieces
fit together.
After you've created a Jobs portal on the Customers layout and viewed the two jobs for Jer-
ald Tabb (
Figure 5-16
), you realize that you have expenses to enter on that job. So head for
the Expenses layout, where you find that the Expenses table has a Job ID field, but not a Job
Name field, which would help you make sure you're chalking expenses up to the right job.
Instead, you'll use the related fields from the Job table, and let FileMaker display the correct
related
data using the relationships you created.
1.
On the Expenses layout, switch to Layout mode
.
That's where the tools that let you put fields on layouts are.
2.
Click at the beginning of the Expenses merge field to place the insertion point in
the text block
.
You want the text block with the angle brackets around it. It reads: “<<Expense>>”.
Make sure your cursor is to the left of all the angle brackets, since they belong with
the Expenses merge field. You'll add a merge field for the Job Name in front of the
Expense name. That way, you can tell at a glance which job an Expense is for.
3.
Choose Insert
→
Merge Field
.
The Specify Field window appears, displaying a list of fields from the table you
worked with the last time you opened the window.