Graphics Programs Reference
In-Depth Information
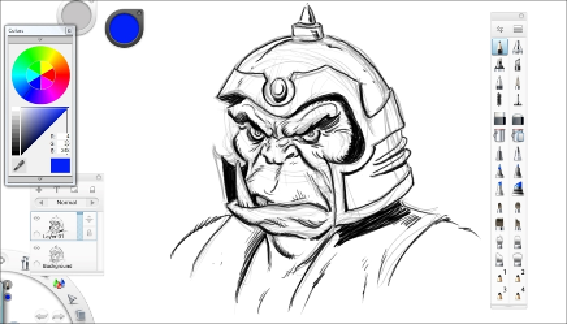
Demo 2 - the Pencil tool and Copic
markers
The drawing of the ogre in the following screenshot was first sketched out using pen-
cil. On that initial layer, the transparency was lowered, and a second layer was placed
where the Pencil tool was used to ink the drawing as well as make whatever correc-
tions were necessary.
By placing a layer beneath the inked drawing, we can begin to color the sketch using
the Copic marker and the Pencil tool. The Pencil tool is also used for more precise
coloring and the marker tool is used to cover larger areas. The only concern is putting
down the local color; it's okay for the color to be uneven at this point because more
color will be continually added over the whole area of the drawing. The initial back-
ground layer where I first sketched was deleted out from the drawing so that it would
not be a distraction. Speaking of distractions, you'll notice from these images that I
keep a lot of windows open as I work. That is just my preference. When I work with
traditional materials, I like to have all my materials at hand; similarly, when I work di-
gitally, I like to see my choices before me. Other people prefer to hide their windows
and leave open only what they are currently using. The advantage to this is a bigger
work area. As previously shown in this section, SketchBook Pro allows you to hide as
many windows as you want according to your preference.