Information Technology Reference
In-Depth Information
The reason the mesh didn't move very well is because the effect of the bone on the
mesh wasn't very well defined by the skin modifier. It did the best it could, but
sometimes it needs a little help. To see the effect that each of the bones has, select
(
right-click
) the
BearSkin
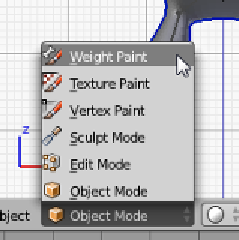
and switch to
Weight Paint
mode either using the same
combo box at the bottom of the 3D View panel or by pressing
Ctrl
+
Tab
.
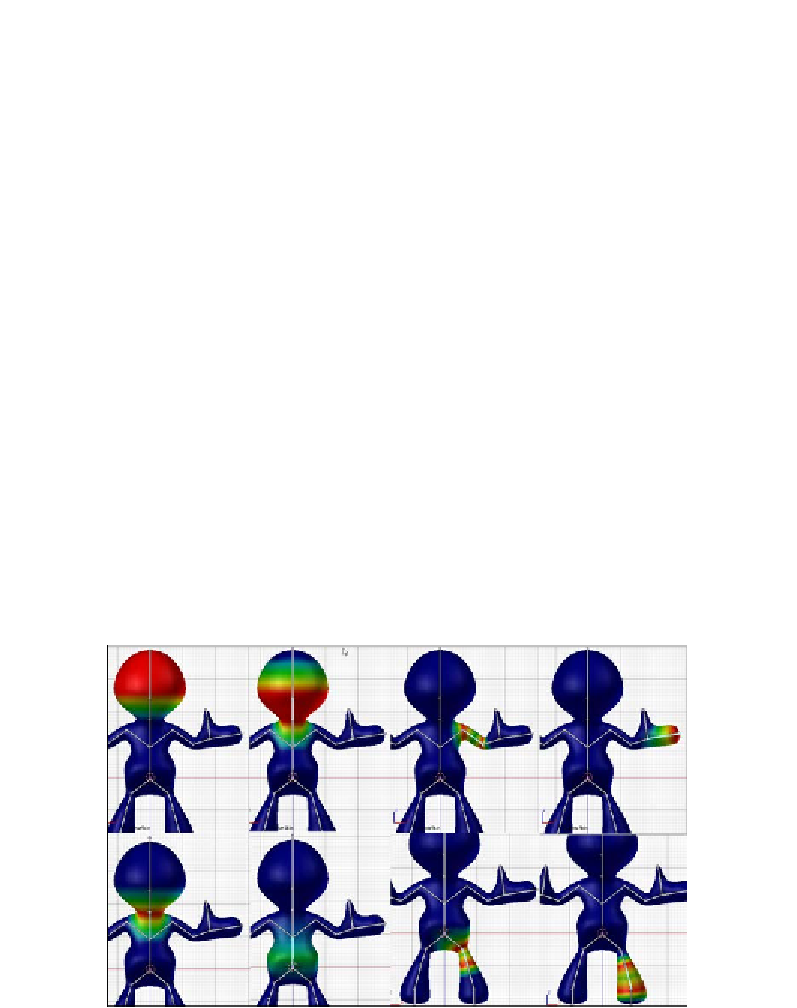
In
Weight Paint
mode the area of effect of each bone can be observed and edited.
The red areas are the places that have a 1-to-1 relationship with the bone, matching
location and rotation. The rainbow of colors from yellow to green to blue are areas
that have less of a relationship with that bone allowing for smooth transitions.
For now just select the various bones to explore how the skin modifier set the bones
area of effect. Actually fixing these weights will come later after some more detail is
added to the mesh.
Note that in
Weight Paint
mode selecting the bones does not deselect the mesh.
This is a useful function when editing the weights.