Graphics Reference
In-Depth Information
For the first exercise we'll be adding a
brilliant flare to one of the lights in the
scene.
1
Select the
Pulp Mill
-
Stabilization
Comp.
2
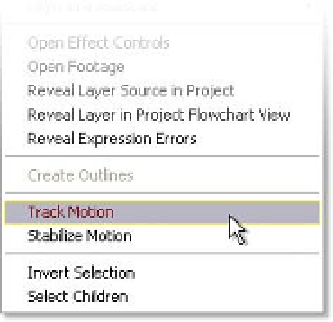
Right-click layer 1 to track the clip.
3
The menu at right opens - select
Track Motion
.
The Composition Window changes into the Layer
Window, where you can apply trackers, adjust Masks
and the clip's Anchor Point (it's similar to the Footage
Window, but without any clip editing capabilities).
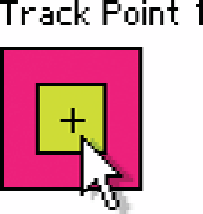
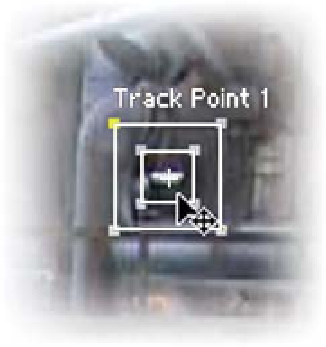
Immediately a Track Point is added to the window.
The Track Point consists of three elements utilized for
calculating tracker data: the outermost box
(highlighted in magenta) designates the Search
Region. This is the furthest area the tracker will consider for the tracked
feature's motion changes. The inside box (highlighted here in green) specifies
the Feature Identifier Boundary: the shape, color, and/or luminosity to track.
The cross-hairs identify the Attach Point that will define the tracking data's
position to be applied to the object (Motion Target) you want to track in the
scene.
Each box is adjustable - the larger the box,
the greater amount of time it takes to track
because it has so much more image to
examine. This can make for a more precise
track (unless there's too much clutter inside
the search area), but usually it's a waste of
time forming the Tracker too large. Also, a
Track Point's inside box is limited to
searching within the boundaries of the
screen area. It cannot travel outside the
Footage Window's image - the smaller
the Feature Identifier Boundary, the closer