Graphics Reference
In-Depth Information
of application:
1
Solo your text layer - identified by both a 'T' icon and the text you type
as its name.
2
Open the Effects & Presets palette by
pressing 'Ctrl' plus the 5 on your main
keyboard, or
Window
Effects &
Presets
.
3
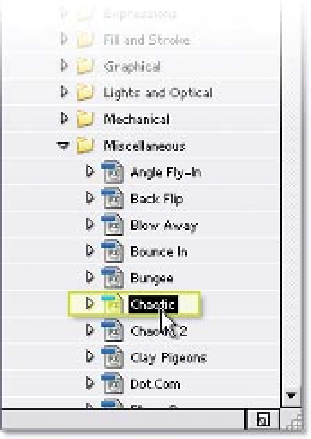
Twirl open
Animation
resets
Text
Miscellaneous
.
4
Select
Chaotic
and drag it into the
Timeline Window onto the
#01
text
layer, then run an RAM Preview.
Previews of the various Animation Presets
are available in
Help
Text Preset Gallery
.
Click on the variety of Related Subtopics to
open an animated gallery of the presets.
5
Select the
#01
text layer and move the Anchor Point (Y) to
the '0' center.
6
At frame 60, create a Keyframe for Scale (Alt
Shift
S) - Scale opens.
7
Go to frame 20 (Ctrl
G) and set the value to 400%.
8
Select the last Keyframe and set it to Easy Ease In (Shift
F9).
9
Go to frame 30 and set a Keyframe for Opacity (Alt
Shift
T).
10
Press 'Home' and set the Opacity to 0%.
11
Activate the Motion Blur check-box in the Timeline's Switches column.
12
Relocate the
#01
layer under the
GS Comp 1
layers.
Deactivate the Solo and run another RAM Preview to watch the chaotic magic
that Text Animation Presets can offer your projects.
141


