Graphics Reference
In-Depth Information
3
Press 'Alt
['.
4
Select layer 7 and press 'Page Up' (PgUp) to move back one frame.
5
Press 'Alt
]'.
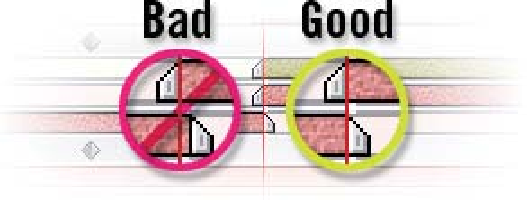
So why did you have
to move the CTI back
one frame? When you
press the Snap End
Point to Current Time
Position (Alt
]), the
End Point includes a
viewable frame from the Timeline's clip. Editors should be familiar with this
'inclusive' marking technique - however, it causes some undesirable results in
your Comp Window. If you do not make this single frame backward adjustment
prior to the End Point's change and just press 'Alt
]', you'll end up with
concurrently overlapping frames which will double the image's intensity on
screen. Go ahead - test it for yourself.
As luck would have it, the transition move into the inside Earth's horizon works,
but it's not good enough. Go to 7:13 and realign the In and Out Points for
layers 1-5 and you'll see that this feels like a better transition point.
Keyframe Interpolation - Temporal (Time)
Easy Eases are the simplest form of Keyframe Interpolation to use, but they are
applied solely in the Timeline Window to make property changes. Changing
Temporal Interpolation affects a Keyframe's response to time changes. After
Effects has several Temporal Interpolation options:
Linear
- increments of change between Keyframes remain constant.
Bezier
- events change smoothly between Keyframes, but can change
abruptly when intersecting the selected Keyframe.
Continuous Bezier
- events change smoothly between Keyframes
and
when intersecting the selected Keyframe.
Auto Bezier
- applies the most gradual and uniform changes leading into
then out of the selected Keyframe.
Hold
- locks the selected Keyframe's values from change until the next
Keyframe is intersected; it makes
very
abrupt changes.


