Graphics Programs Reference
In-Depth Information
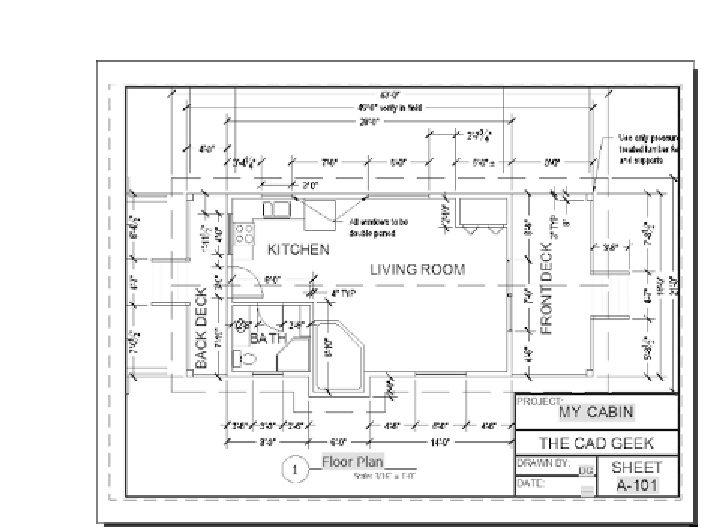
FiGuRE 15.30
The cabin drawing ready for printing from a layout
5.
In the Plot Scale area, the scale has been set to 1:1. This is what you want.
6.
In the Plot Offset group, the Center The Plot check box is grayed out;
it isn't needed when using a layout to plot.
7.
Expand the Plot dialog box as necessary to verify that the
monochrome
.ctb
Plot Style Table is assigned.
There are no changes to make. Because this layout was set up for
printing when it was created, all the settings in the Plot dialog box
are automatically set correctly.
8.
In the lower-left corner, select Preview. Your preview should look like
Figure 15.31. Notice how the preview looks exactly like the layout, but
without the dashed frame.
9.
Right-click and choose Exit to close the preview window. Click OK to
start the print. Save the resulting electronic plot as
15-A-100.dwfx
.
This exercise shows that once a layout has been created, most of the setup
work for printing is already done for you. This greatly simplifies the printing
process because the parameters of the print are determined before the
PLOT
command begins.
Search WWH ::

Custom Search