Graphics Programs Reference
In-Depth Information
Let's explore how the cursor is related to the coordinates in the drawing.
1.
Click the Zoom Extents button located on the navigation bar (the
semitransparent vertical bar under the ViewCube), or enter
ZOOM
↵
E
↵
to adjust your view to show the extents of the drawing area.
2.
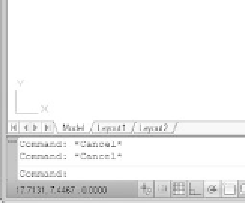
Move the cursor around, and notice the left end of the status bar at
the bottom of the screen. This is the coordinate readout, and it dis-
plays the coordinates of the cursor's position, as shown in Figure 2.13.
FiGuRE 2.13
The x- and y-coordinates of the cursor are shown at the
bottom of the AutoCAD window.
3.
Move the cursor as close to the lower-left corner of the drawing area
as you can without it changing into an arrow. The coordinate readout
should be close to
0.0000, 0.0000, 0.0000
.
4.
Move the cursor to the top-left corner of the drawing area. The read-
out changes to something close to
0.0000, 7.0000, 0.0000
, indicat-
ing that the top of the screen is 7 units from the bottom.
5.
Move the cursor one more time to the upper-right corner of the
drawing area. The readout still has a y-coordinate of approximately
7.0000
. The x-coordinate now has a value around
10.5
.
The drawing area of a new drawing is preset with the lower-left corner of the
drawing at the coordinates
0,0
.
NOTE
For the moment, it doesn't matter what measure of distance
these units represent. I'll address that topic in Chapter 3, “Setting Up a
Drawing.” Don't worry about the four decimal places in the coordinate read-
out; the number of places is controlled by a setting you'll learn about soon.


Search WWH ::

Custom Search