Graphics Programs Reference
In-Depth Information
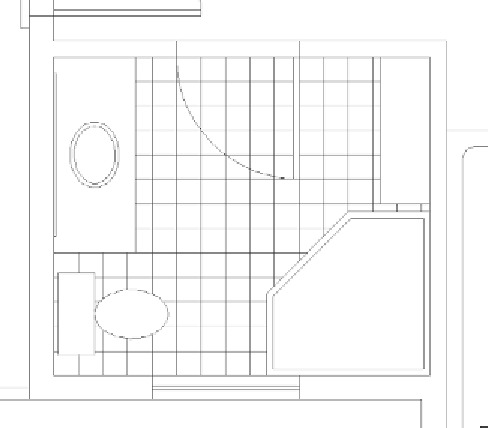
FiGuRE 11.19
The tiled hatch pattern in place
Note that the user-defined pattern has no scale factor to worry about. You
simply set the distance between lines in the Spacing text box.
WARNING
If you can't get the
HATCH
command to hatch the
desired area, you might have left a gap between some of the lines serving as
the hatch boundary. this can prevent autoCaD from finding the boundary
you intend to use. Zoom into the areas where objects meet, and check to see
that there are no gaps or increase the Gap Tolerance value on the expanded
Options panel in the contextual hatch Creation tab.
Controlling the origin of the Hatch Pattern
Often, a designer wants to lay out the tile pattern such that the pattern is centered
in the room or starts along one particular edge. For this project, the tiles are set to
start in the center of the room and move out to the edges, where they're cut to fit.
You'll change the hatch pattern's origin to set this up in the kitchen:
1.
Use the Pan and Zoom tools to slide the drawing up until the kitchen
occupies the screen. Thaw the A-AREA-NPLT layer.
2.
Turn Object Snap Tracking on (on the status bar), and set the
Midpoint osnap to be running.
3.
Start the
HATCH
command, and make sure User Defined is still selected
as the Hatch Type.


Search WWH ::

Custom Search