Graphics Programs Reference
In-Depth Information
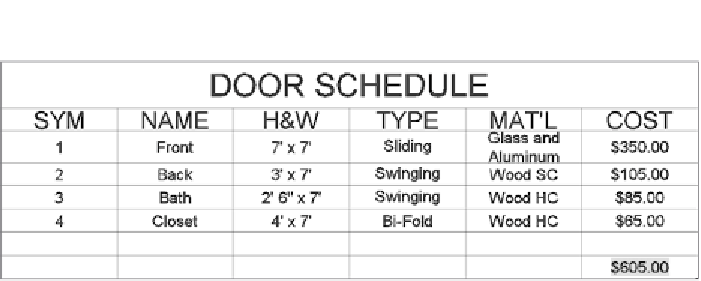
FiGuRE 9.71
The completed table
TIP
You would expect that the formatting assigned to the cell previ-
ously would carry through to the formula, but it doesn't always. You might
need to reformat individual cells as required.
The table is finished and now you just need to do a little cleanup in your draw-
ing to avoid any problems in the future and to tie elements in the drawing back
to the table.
1.
Thaw the A-ANNO-TTLB-TEXT and A-ANNO-TTLB layers; then move
your table, as required, so that it doesn't overlap the notes or title block.
2.
You need a symbol for each door that corresponds with each number
in the SYM column. With the A-ANNO-TABL layer current, draw a
circle with a radius of 8
″
(204).
3.
Press the Single Line Text button in the Annotation panel under the
Home tab. Right-click and choose the Justify option from the context
menu, and then choose the Middle option so the text will be centered
around the insertion point.
4.
Activate the Center osnap and then click the circle. Set the height
to 10
″
(254) and the rotation angle to 0. When the blinking cursor
appears at the center of the circle, enter
1
↵↵
. The number 1 is cen-
tered in the circle.
5.
Move the symbol near the front door, as shown in Figure 9.72, and
then copy it to locations near the other three doors.
6.
Edit each of the symbol's numbers so they correspond with their
entry in the SYM column. Your drawing should look like Figure 9.73.


Search WWH ::

Custom Search