Graphics Programs Reference
In-Depth Information
You have six options for constructing a circle. The first two require
you to specify a point as the center of the circle and to enter a radius or
a diameter. You use the next two when you know two or three points
that the circle must intersect. The last two options use tangents and
a radius or just tangents to form a circle. Notice that each circle con-
struction method has a unique icon on the left side of the fly-out menu.
Whichever method was used last becomes the default method when you
click the Circle button, and its icon appears on the button.
3.
Choose the Center, Radius option from the fly-out menu.
4.
The command prompt changes from
Specify center point for
circle or:
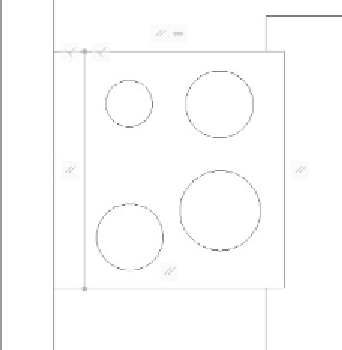
to Base point:. Draw four circles as shown in Figure 5.51.
Once again, your intent at this point is to develop a solid geometric
representation of the stove. Before applying dimensional constraints,
I'll show you how to add some additional geometric constraints.
FiGuRE 5.51
Rough schematic representation of the stove
Applying Additional Geometric Constraints
You've seen how the Auto Constrain and Infer Constraints features make it
easy to add geometric constraints to your drawing. While both are incred-
ibly powerful features, sometimes you need an extra degree of control over how
geometric constraints are added to your drawing. For this reason you have the
option of manually adding geometric constraints to objects inside your drawing.
Even if you had been more deliberate in drawing the burners with the proper
alignment and size, the Auto Constrain feature would still have a difficult


Search WWH ::

Custom Search