Graphics Programs Reference
In-Depth Information
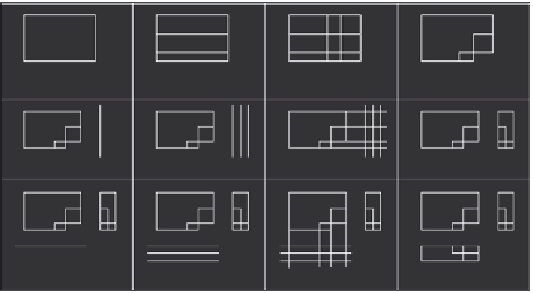
3
1
2
4
5
6
7
8
9
10
11
12
FiGuRE 4.85
The 12 steps for creating the block
Next, draw the right side view:
5.
Draw a vertical line to the right of the top view. Make it longer than
the top view is deep.
6.
Offset the vertical line 2.4 to the right, and then offset the new line
2.4 to the right also.
7.
Use the Endpoint osnap to draw lines from the corner points of the
top view across the three vertical lines.
8.
Trim the lines back to complete the side view.
Finally, draw the front view:
9.
Draw a horizontal line below the top view. Make it longer than the
top view is wide.
10.
Offset this line 2.4 down, and then offset the new line 2.4 down.
11.
Use the Endpoint osnap to draw lines from the corner points of the
top view, down across the three horizontal lines.
12.
Trim the lines back to complete the view.
This ends the exercise. You can rotate and move each view relative to the
other views in several ways. We'll look at those commands later in the topic and
then draw more views in Chapter 8.

Search WWH ::

Custom Search