Game Development Reference
In-Depth Information
Figure 16-8
.
Open sprite1.png, select the Paths Tool, and start to draw a simple Path
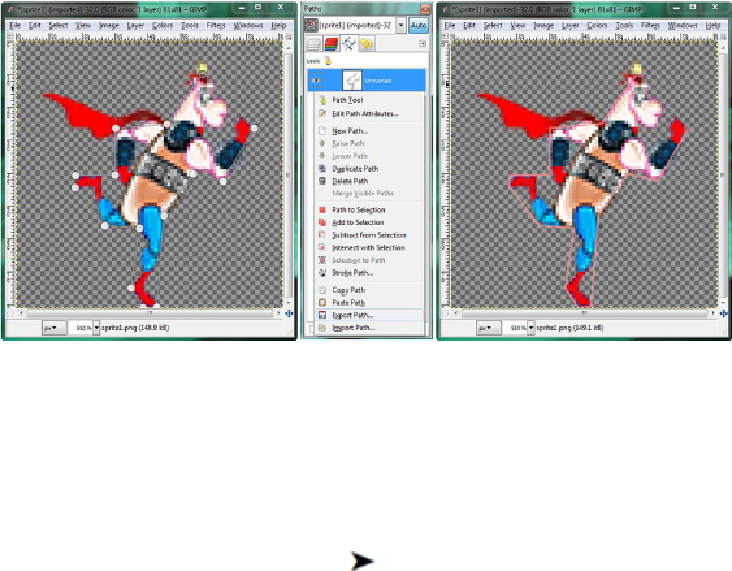
As you can see in
Figure 16-9
, I created the collision polygon using only
15 points
.
You can leave the polygon open, and simply add the
Z
character you learned about in
the first section of the topic, to create a
closed polygon
. As you can see on the right
side of
Figure 16-9
, the polygon conforms closely to the sprite, so during game play the
result of a collision will look like it happened with the pixels of your sprite rather than
with the collision polygon, which even though the collision polygon path data is visible
here in GIMP, will be invisible during your game play.
Figure 16-9
.
Insert 15 strategically placed points to define a collision shape and use the Export Path to export SVG
data
Export your hand-drawn path, by selecting, and right-clicking on the
Unnamed
Path
shown in the middle of
Figure 16-9
, and use the
Export Path
menu option to ex-
port it as the file
sprite1svghand.svg
, just like you did back in
Figure 16-5
.
If you
want to name the path in GIMP, you can double-click on the path name in the path dia-
log, and give it a name, if you like. If you want to save your work in the native GIMP
.xcf
file format, you can also use the
File
Save
menu sequence, and give the file a
name, such as
sprite1svgpath15points.xcf
.
Next, use your Text Editor's (Notepad, for instance)
File Open
dialog, as was
shown in
Figure 16-6
, and open the latest
sprite1svghand.svg
file, so you can see how
much data you have saved relative to the nearly 100 data point pairs that the GIMP
Fuzzy Select Tool selection work process provided for us in the first section of this
chapter.