Game Development Reference
In-Depth Information
Figure 1-11
.
Accept the terms of the license agreement, click the Next button (left), and then do the same for JUnit
(right)
In the JUnit License Agreement dialog, presented in
Figure 1-11
(right), click the
radio button
next to the
I accept the terms in the license agreement
statement, and
click the
Next
button to proceed with the installation. The next two installer dialogs, il-
lustrated in
Figure 1-12
, will allow you to specify where NetBeans 8.0 and GlassFish
4.0 will be installed on your system. I suggest accepting the default installation loca-
tions in these two dialogs as well. As you will notice, the NetBeans installer has found
your Java installation in its default location as well.
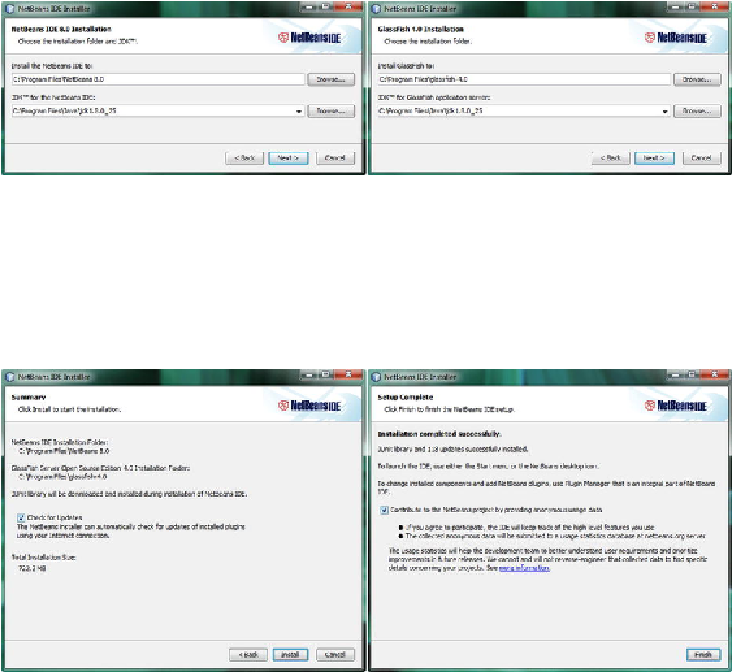
Figure 1-12
.
Accept the default installation directory suggestions for NetBeans IDE (left) and GlassFish 4.0 (right)
Once you accept these default installation locations and click the
Next
button to ad-
vance through these dialogs, you will get a
Summary
dialog, shown in
Figure 1-13
(left). This dialog contains an
Install
button, which will trigger the installation that you
have set up over the previous five NetBeans IDE 8.0 installation dialogs.