Agriculture Reference
In-Depth Information
bottom of the hexagons. Temperature is important, though not absolutely critical.
Play with it a little to see what you need.
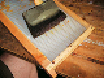
Dip a sponge brush into a pan of melted wax, and then paint the wax onto the plastic
foundation. For more information on melting beeswax, see page 146.
Additional Equipment
There are some additional pieces of equipment that will make some things you do easi-
er, and in most cases faster.
Burr Comb/Beeswax Collector
A beeswax collector can be as simple as a pail, can, or box to place beeswax scrapings
into each time you examine your colony. Bees will put errant comb in places you don't
want. Instead of discarding this valuable product, remove it and save it. Use your hive
tool to slide under the comb and lift it up and out. Buy a small container that hangs on
the side of your hive, make one, or simply use a small pail or can.
Cappings Scratcher
This very sharp, forklike tool is for removing cappings the uncapping knife cannot
reach. A scratcher is also handy when looking for varroa mites. (Open drone brood cells
to inspect for varroa mites.)
Maxant-Style Hive Tool
This common hive tool has a flat blade on one end and a rounded, 90-degree curved
other end, that helps pry out frames from the sides or ends, wherever you can gain pur-
chase. Slide the hooked end under the lug of the frame, use the base of the hook as the
fulcrum on an adjacent frame or the side of the box, and easily lift the frame out. The
flat end has a two-sided edge for separating supers or as a general scraping tool.