Graphics Reference
In-Depth Information
with
V
v
=
p
a
−
p
e
,
V
w
=
V
up
×
V
v
,
V
u
=
V
v
×
V
w
.
Tutorial 15.3.
Project Name:
D3D
_
CameraMouseUI
Library Support:
UWB
_
MFC
_
Lib1
UWB
_
D3D
_
Lib14
Tutorial 15.3. Manipulating Cameras with the Mouse
•
Goal.
Demonstrate and understand the basics of how to manipulate camera
parameters, and the simple approaches to visualizing the camera.
•
Approach.
Implement the basic camera manipulation operations: zoom-
ing, rotating, and panning; and visualize camera positions in the application
windows.
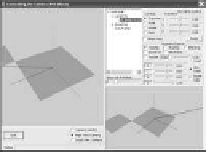
Figure 15.3 is a screenshot of running Tutorial 15.3. The application window
appears similar to that of Tutorial 15.2, except that there is a new black line in
both views. This line represents the other camera, that is, the black line appearing
in the main view represents the camera from the small view, and vice versa. The
two ends on this black line represent the eye and look-at positions. This tutorial
supports interactive manipulation of the camera parameters with the mouse.
Figure 15.3.
Tutorial
15.3.
GUI implementation de-
tails.
Mouse event service
routines are defined in
DrawAndMouseHandler.cpp
(in the
WindowHandler
folder
of the
D3D
_
CameraMouseUI
project). The
UWB
_
Camera
GUI interaction support
functions are defined in
uwbgl
_
Camera
_
Xform1.cpp
(in the
Camera
folder of the
UWBGL
_
D3D
_
Lib14
project.
•
Left mouse button.
To rotate the camera. Click and drag with the left
mouse button in the main view and notice that left/right movement rotates
the camera in the horizontal direction, whereas up/down left mouse button
drag rotates the camera in the vertical direction. As you left mouse button
drag in the main view, notice the corresponding movements of the black
line in the small view. The black line helps us visualize and understand the
camera movement. The same functionality is also supported by the small
view. This movement is sometimes referred to as tumble.
•
Middle mouse button.
To pan the view. Click and drag with the middle
mouse button in the main view and notice how it appears as though we are
panning to different regions of the application window with the panning
direction corresponding to the mouse movement directions. Once again,
by looking at the black line in the small view, we can visualize the actual
camera movement. This movement is also referred to as track around the
window.
•
Right mouse button.
To zoom the camera. Click and drag with the right
mouse button in the main view and notice a leftward drag moves the camera
toward the squares and a rightward drag moves the camera away.
This
movement is also referred to as dolly into or out of a view.


Search WWH ::

Custom Search