Graphics Programs Reference
In-Depth Information
2.
Make sure the NURBS option is on by typing
SURFACEMODELINGMODE
↵
1
↵.
3.
Click the Extrude tool from the Surfaces - Create tool group on the Tool Sets palette.
4.
Type
MO
↵
SU
↵ to create an extruded surface.
5.
Select the spline and press ↵.
6.
Point the cursor upward and type
6
↵ to make the extruded surface 6 units in the Z axis.
7.
Select the NURBS surface.
8.
In the Surface Associativity category in the Properties Inspector palette, select Maintain
Associativity and None.
E
X P O S I N G
CV
S
T O
E
D I T
A
NURBS S
U R F A C E
You've just created a NURBS surface. You can expose the CVs for the surface using the Show CV
tool. Try the following to view and edit the CVs.
1.
Select the NURBS surface.
2.
In the Geometry category in the Properties Inspector palette, click the CV Hull check box.
The CVs appear for the surface.
3.
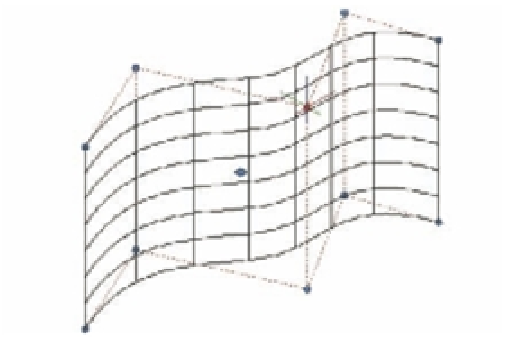
Click the CV as shown in Figure 23.50.
FIGURE 23.50
Exposing the CVs
Click and drag this CV along the Y axis.
4.
Move the CV in the Y axis and notice how the surface deforms. The top edge moves with
the CV, while the bottom edge maintains its shape.
5.
Press the Esc key twice to clear your selection.
In this exercise, you saw how you can gain access to the CVs of a NURBS surface to make
changes to the shape. Right now, the CVs are located only at the top and bottom of the surface,
but you can add more CVs to give you more control over the shape of the surface.


