Graphics Programs Reference
In-Depth Information
In this exercise, you switched from the Move gizmo to the Rotate gizmo. You can also use the
Scale gizmo to scale a face or edge.
This may not be the most accurate rendition of a surfboard (our apologies if you are a surfer),
but the general shape of the surfboard has given you a chance to explore many of the features of
the Mesh toolset.
CHANGING THE GIZMO ON-THE-FLY
In addition to the right-click menu, you can change the current gizmo using the Gizmo drop-down
list on the expanded status bar. You can also set the orientation of the gizmo through the Gizmo
shortcut menu, which will allow you to move subobjects in directions other than perpendicular
to the face or edge. You can orient the gizmo to the WCS, the current UCS, or a face on a mesh
through the Align Gizmo With option on the shortcut menu (refer back to Figure 23.19).
Adding a Crease
The Add Crease tool can help you fine-tune your mesh shapes. It does exactly what it says. It can
introduce a crease in your otherwise smooth mesh shape. The Add Crease tool does this in two
ways: It can flatten a face or remove the smoothing around an edge.
In the following exercises, you'll use the surfboard one more time to experiment with the
Add Crease tool. First you'll see how you can add a sharp point to the surfboard:
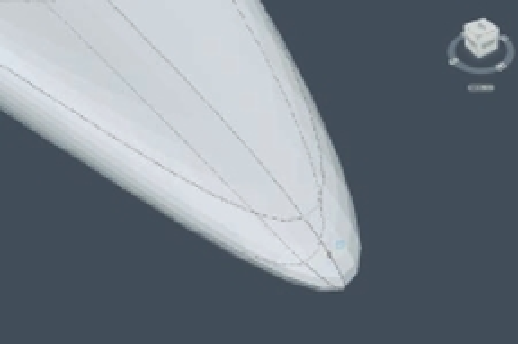
1.
Adjust your view of the surfboard so you can see the front point, as shown in
Figure 23.21. Turn off the grid so you can see the shape clearly.
FIGURE 23.21
Set up your
view. Select the
front edge of
the surfboard.
Select the
front edge.
2.
Type
CREASE
↵ (or choose Modify
Mesh Editing
Crease from the menu bar). At the
Select mesh subobjects to crease: prompt, select a face from the front as shown in
Figure 23.21 and press Enter.
3.
At the Specify crease value [Always]<Always>: press Enter.
You can see from this exercise that the front edge of the surfboard is now quite sharp since it
no longer has any smoothness, as shown in Figure 23.22.